In Windows XP, it’s possible to turn off indexing of some or all hard disk drive (HDD) one by one or to disable indexing service altogether (which will turn off indexing on all drives). Searching is still possible after disabling of indexing, albeit more slowly.
Turn off indexing on particular hard disk drive
- Open up “My Computer, or open “Windows Explorer”, and then expand Computer tree.
- Right click on the hard drive to disable indexing (i.e (C:) drive letter).
- Select Properties on the contextual menu.
- Click on General tab if it’s not already selected.
- Untick (unselect) the check box for Allow Indexing Service to index this disk for fast file searching option.
- Click OK, and wait for the index removal process to complete, which may take a few minutes.
- Repeat the steps for other hard drives if applicable.
Disable the Indexing Service in Windows XP
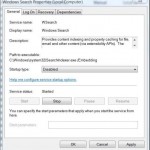
- Open “Control Panel”, select “Administrator Tools”, and open Services applet. Alternatively, type services.msc in the Run text box from Start menu, and then hit Enter.
- Scroll down and locate Indexing Service service, and then double click on it.
- Click on Stop button to immediately stop the indexing service if the service status shows “Running”.
- Under the “Startup Type”, select Disabled to permanently disable the indexing service so that it won’t run again.
- Click OK.


