Delete and Remove Protected/Hidden EISA, OEM, Recovery, EFI & System Partition
Disk Management of Windows operating system is a simple yet effective tool to initiate, create, delete, manage and format disk partitions or volumes. Disk Management can be accessed via Control Panel -> System and Security -> Administrative Tools -> Computer Management -> Disk Management under Storage tree, or directly via diskmgmt.msc command.
However, Disk Management is limited in its ability, especially when dealing with hidden, system, reserved, recovery and system partitions that are protected by Windows operating system. Most if not all OEM desktop computers or notebook PCs from Dell, HP, Lenovo, Acer, ASUS, Samsung, Alienware, Sony, Fujitsu, Toshiba and etc. comes with special OEM, EISA or EFI partition either in FAT or NTFS file system that contains boot loaders, system recovery utility to rollback to original default factory settings, diagnostic tools, device driver files, system utility programs and system configuration files that are used by the firmware at boot time or to be run before an operating system is booted, and/or for other purposes.
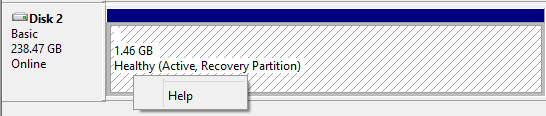
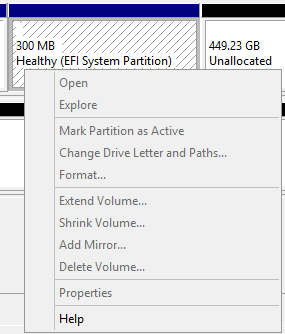
These special partitions, which can be hidden from view, or without any drive letter assigned, can have a size of from few gigabytes to 10 GB or more. As most of these disk partitions is protected and locked by the operating systems to prevent and avoid accidental deletion of these partitions, they cannot be deleted by using Disk Management snap-in. The partition cannot be merged into any other existing partition either. When right clicking on these protected partitions, the menu is greyed out and disable, or simply cut-shorted with most options not available. Some users reported that even advanced third-party disk management tool such as Acronis Disk Director and Partition Magic cannot manipulate, change, remove and delete the partition either under Windows desktop.
Some users may not want to keep the EISA, recovery, EFI system and other protected and hidden partitions that come pre-configured on the computer. By deleting these partitions, it’s possible to free up a few GBs of hard disk storage space. Follow the steps below to use Diskpart, a text-mode command line interpreter based on scripts that manages hard disk, partition and volume in Windows, to delete any unwanted partition that is undeletable under Disk Management tool.
Note
If the partition that you want to remove is a recovery partition, it’s recommended to check with manufacturer if the OEM provides any guide, procedure or utility to remove and partition and recovery partition, such as Lenovo ThinkPad. Normally, most OEM provides a GUI-based application that asks you to create a recovery DVD or USB flash drive before allowing you to discard that recovery partition.
Warning
Some partition, especially EFI System Partition (ESP) contains boot loader which may cause your system unbootable if deleted. So proceed with care.
Open a command prompt as administrator.
Run Diskpart application by typing the following command (hit Enter key after entering all commands to execute them):
diskpart
List all hard disk drives installed on the system:
DISKPART> list disk

  Disk ###  Status         Size     Free     Dyn  Gpt
  --------  -------------  -------  -------  ---  ---
  Disk 0    Online          223 GB      0 B
  Disk 1    Online          465 GB  1024 KB
  Disk 2    Online          238 GB   237 GB
Tip
If you don’t see the disk you want, enter rescan command and press Enter key to re-scan all partitions, volumes and drives available.
Select the disk that you want to manage its partitions:
DISKPART> select disk 2

Disk 2 is now the selected disk.
Remember to specify the correct number of disk to manage (in example above, change number 2 to appropriate number corresponding to the number as listed in “list disk” command). Normally, with just 1 hard disk, it will be disk 0.
Show all available and created partitions in the disk selected:
DISKPART> select partition 1

Partition 1 is now the selected partition.
Change number of partition (1 in example above) to actual number reflecting the partition that you want to delete. Be careful with the number of this partition, as wrong number may get data wipes off accidentally.
Optionally, check the details of partition to ensure it’s the correct one:
DISKPART> detail partition
Partition 1 Type : 27 Hidden: Yes Active: Yes Offset in Bytes: 1048576
Volume ### Ltr Label Fs Type Size Status Info ———- — ———– —– ———- ——- ——— ——– * Volume 3 System NTFS Partition 1500 MB Healthy Hidden
Optionally, mark the partition as inactive:
DISKPART> inactive

DiskPart marked the current partition as inactive.
The most important step, delete the partition:
DISKPART> delete partition override

DiskPart successfully deleted the selected partition.
Once the partition has been deleted, exit from Diskpart, and now users can use the much familiar and much easier Disk Management tool to manipulate the freed unallocated partition. Users can create a new volume (partition) with this space, or simply merge it to existing partition by extending the size of the existing partition.
LK is a technology writer for Tech Journey with background of system and network administrator. He has be documenting his experiences in digital and technology world for over 15 years.Connect with LK through Tech Journey on Facebook, Twitter or Google+.


 Size in Windows")


