Change Sync Folder Location of OneDrive for Business
OneDrive for Business is part of Office 365 or SharePoint Server which provides cloud storage and personal library for storing and organizing the work documents. By default, in Windows, when you sync a document library with OneDrive for Business client app on Windows desktop, OneDrive client syncs the files in a folder named “OneDrive” or “OneDrive for Business” under the “User” folder, i.e. C:\Users\user name\.
It’s possible to change the default storage location of OneDrive for Business where the synchronization of document libraries to and from the cloud takes place. Selection of folder location to save the content of document library synced to local hard disk drive when synchronization is established.
Note
If you are already syncing any document libraries, and you want to change the path of OneDrive for Business folder, the syncing of all libraries must be first stopped. To do so:
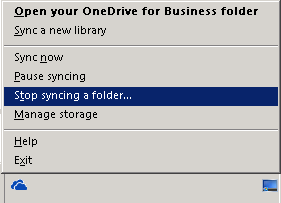
Right click on the OneDrive icon on the notification area (system tray) on the Taskbar, and select Stop syncing a folder on the context menu.
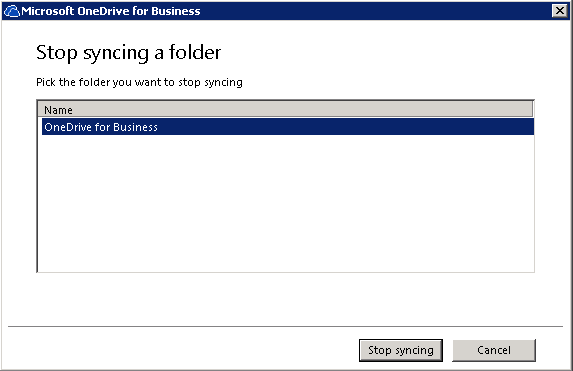
Select the folder which you want to stop syncing, and click or tap on Stop syncing button.
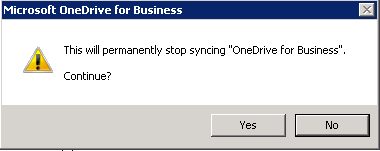
Hit OK to continue when prompted for confirmation.
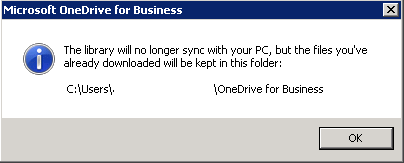
When done, click or tap on OK button on the confirmation dialog which let you know the folder which downloaded files are kept.
Repeat above steps to stop syncing all folders and libraries.
Here’s how to change the default syncing storage location for document libraries synced via OneDrive for Business:
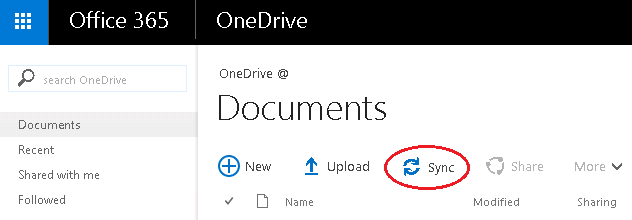
Click or tap on the menu icon on the top left corner to open the apps menu (or on the top bar), and then go to OneDrive, Sites or Team Site (for SharePoint library).
Browse to the folder or library which you want to sync to local PC via OneDrive for Business client.
Click or tap on the Sync button.
You must download and install OneDrive for Business client on the device before performing the following steps. If you haven’t done so, download OneDrive for Business from https://onedrive.live.com/about/download/
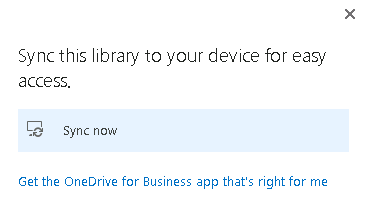
Click or tap on Sync now when prompted to sync this library to your device for easy access to automatically open OneDrive for Business app to sync the selected library.
In some web browser, you’ll be explicitly asked to give permission before launching the OneDrive for Business app. For example, in Google Chrome, you need to click or tap on Launch Application on the “External Protocol Request” prompt.
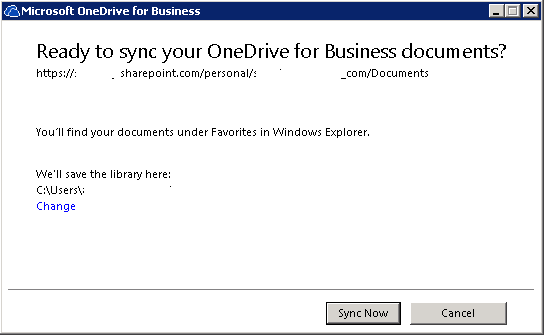
On the OneDrive for Business sync setup dialog, click or tap on Change link, and then select the new folder location which you want to use as the root path for all OneDrive for Business sync libraries. Click or tap Sync Now button when done.
Note
If you don’t see the “Change” link, you currently still have at least a library in sync via OneDrive. Unlike any synced libraries to proceed.
OneDrive for Business automatically creates a “OneDrive for Business” folder on the root path you selected, and stores all synced documents and folders inside it. The name of the root folder cannot be changed, and is different from just “OneDrive” used by free public edition of OneDrive app with personal Microsoft Account (MSA). Thus, you can select the same root path location if you’re using both OneDrive and OneDrive for Business accounts.
LK is a technology writer for Tech Journey with background of system and network administrator. He has be documenting his experiences in digital and technology world for over 15 years.Connect with LK through Tech Journey on Facebook, Twitter or Google+.
 In some web browser, you’ll be explicitly asked to give permission before launching the OneDrive for Business app. For example, in Google Chrome, you need to click or tap on Launch Application on the “External Protocol Request” prompt.
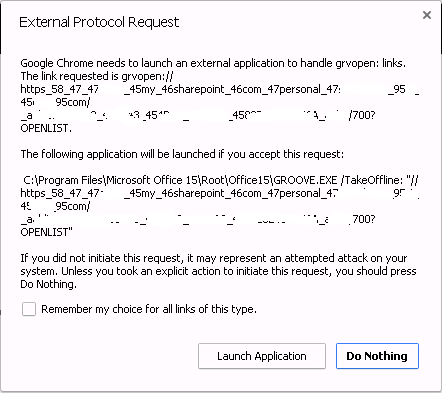
 NoteIf you don’t see the “Change” link, you currently still have at least a library in sync via OneDrive. Unlike any synced libraries to proceed.
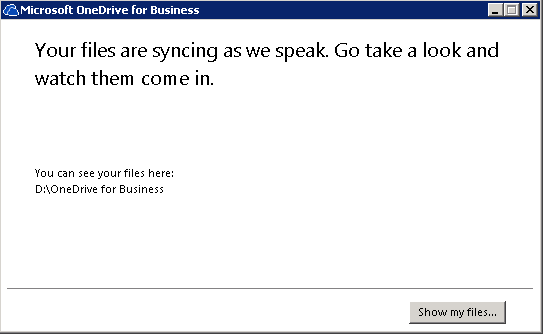
 OneDrive Desktop Icon")
 Free Cloud Storage Space")

 in Windows 10 File Explorer")
")


 in Windows 10 File Explorer")