CloudFlare CDN Cache Everything Page Rules to Speed Up Dynamic WordPress HTML
CloudFlare bills itself as web performance and security service provider and one of most important and useful features of CloudFlare is CDN (Content Delivery Network). CloudFlare CDN caches the content across its many datacenters located at various locations globally, making the website content serves from servers closer to visitors and hence faster in response time and loading time, in addition to taking advantage of more powerful and more efficient hardware used by CloudFlare, when comparing with average web publishers.
Furthermore, using CloudFlare as CDN is extremely easy – just add the domain to CloudFlare as DNS hosting service and enable the CloudFlare as HTTP proxy for the domain. However, by default, CloudFlare CDN caches only static content by file extensions, such as images, documents, CSS, Acrobat PDF, JavaScript (JS), Java and etc. It won’t caches HTML even though the website’s web page may be static, i.e. seldom changes.
The free CloudFlare CDN can be used as complete CDN solution, with the “Cache Everything” option using Page Rules. Cache Everything allows all site contents, including HTML web page, for the domain that pass through CloudFlare as proxy to be cached and served directly from CloudFlare global network.
When turning on Cache Everything on CloudFlare, WordPress web publishers have to take extra precaution so that features that required login do not accidentally get cached by CloudFlare, and served to visitors unknowingly. For example, blog post or page preview URLs, Toolbar on the frontend, WordPress backend wp-admin pages, wp-login.php page, paid contents and other dynamic content meant for signed-in users only.
Note
CloudFlare’s Cache Everything, at least on free plan, may not be suitable for WordPress with dynamic and constantly changing content, such as having a running counter, high comments volume, as the cached version of web pages may not reflect the subsequent changes on the web page until the cache is flushed or purged.
This tutorial shows how to activate Cache Everything on CloudFlare for a WordPress website in order to fully speed up the website from HTML to images through CloudFlare CDN.
If you haven’t use CloudFlare, register for an account.
If the domain is not already added to CloudFlare and the domain is still not using CloudFlare as DNS server, do the following:
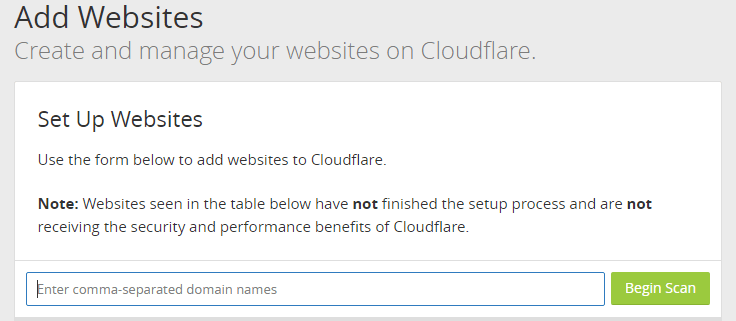
In CloudFlare, hit +Add Site to allow CloudFlare to Begin Scan and import DNS records and set up the website in CloudFlare.
When the scan is complete, click on Continue Setup.
Verify the DNS records for the domain (add missing one, edit incorrect one or remove unused one), and hit Continue button.
Select Free Website as the CloudFlare plan, and hit Continue.
Change the nameservers (NS servers) as defined on the domain registrar to the CloudFlare nameservers, and then click on Continue. Once CloudFlare verifies that the name servers are correctly configured, the domain will be added to CloudFlare and available for use.
In CloudFlare, under DNS tab, make sure that status is Orange in color for the domain and sub-domains that you want CloudFlare to cache. When mouse over, the status is DNS and HTTP proxy (CDN), indicating that HTTP proxy is enabled.
Go to Caching tab.
Under Browser Cache Expiration section, set the option to Respect Existing Headers.
Note
This setting is to ensure that CloudFlare does not rewrite or modify the private, no-store and no-cache Cache-Control header set by WordPress for certain web pages, such as wp-admin pages, previews and web pages with admin toolbar, to public and cache-able.
Go to Page Rules tab.
Note
Free plan of CloudFlare allows only maximum of 3 page rules.
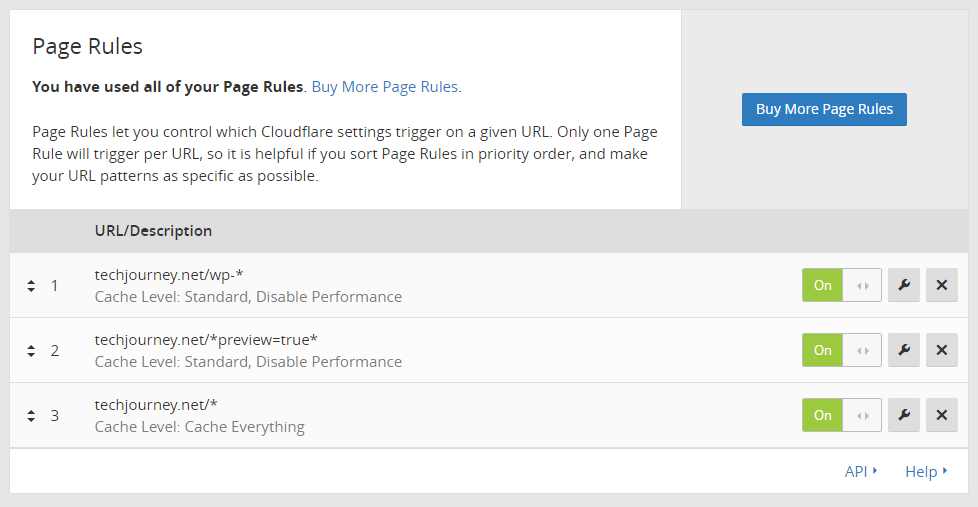
Page Rules must be sort and set in priority order as only one Page Rule will trigger per URL. When a URL pattern is matched, CloudFlare will stop processing the subsequent Page Rules.
Create the following rules (rules 1 to 3 are optional), and click Hit and Deploy when done for each rules:
If the URL matches: domain.name/wp-admin* {replace domain.name with actual domain name}
Then the settings are: Cache Level: Standard Disable Performance
Note
You can also set the Cache Level as Bypass. However, Standard allows some static contents such as images, JS and CSS to be cached, while skipping HTML.
Tip
If you’re setting Cache Level as Standard, you can opt to use URL pattern of domain.name/wp-*, which will exclude all subdirectories and files starting with “wp-” from been cached, including wp-login.php (thus save additional rule) and wp-includes, while continue to allow static content from wp-content folder to be cached on CloudFlare.
This rule is optional and meant for fail-safe purpose. If you’re running out of rules, you can skip creating this rule. It’s because WordPress automatically sets “private”, “no-store”, “no-cache”, “must-revalidate” and/or “max-age=0” headers by default for web pages which shouldn’t be cached, including the preview URL when logged in, and 404 not found page when logged out. CloudFlare’s Cache Everything respects these headers and will not cache web pages in wp-admin folder unless Edge Cache TTL is set. See explanation in rule 3.
If the URL matches: domain.name/*preview=true* {replace domain.name with actual domain name}
Then the settings are: Cache Level: Standard Disable Performance
Note
You can also set the Cache Level as Bypass. However, Standard allows some static contents such as images, JS and CSS to be cached, while skipping HTML.
This rule is optional and meant for fail-safe purpose. If you’re running out of rules, you can skip creating this rule. It’s because WordPress automatically sets “private”, “no-store”, “no-cache”, “must-revalidate” and/or “max-age=0” headers by default for web pages which shouldn’t be cached, including preview page. CloudFlare’s Cache Everything respects these headers and will not cache web pages in wp-admin folder unless Edge Cache TTL is set. See explanation in rule 3.
If the URL matches: domain.name/wp-login.php* {replace domain.name with actual domain name}
Then the settings are: Cache Level: Standard Disable Performance
Note
You can also set the Cache Level as Bypass. However, Standard allows some static contents such as images, JS and CSS to be cached, while skipping HTML.
Note
If you’re running out of Page Rules, it’s possible to combine rule 1 and rule 3 into just one rule:
domain.name/wp-*
In this case, you should use Cache Level as Standard, as the rule will exclude all subdirectories and files starting with “wp-” from been cached, where most static JS, CSS, plugin, theme and image files are located, especially wp-content folder. If you choose to bypass caching, these static resources won’t be cached and served by CloudFlare CDN.
If you’re running out of Page Rules but having problem logging into WordPress backend (such as getting error message “ERROR: Cookies are blocked or not supported by your browser. You must enable cookies to use WordPress”, you can try to rename the login page with plugins.
This rule is optional and meant for fail-safe purpose. If you’re running out of rules, you can skip creating this rule. It’s because WordPress automatically sets “private”, “no-store”, “no-cache”, “must-revalidate” and/or “max-age=0” headers by default for web pages which shouldn’t be cached, including preview page. CloudFlare’s Cache Everything respects these headers and will not cache web pages in wp-admin folder unless Edge Cache TTL is set. See explanation in rule 3.
If the URL matches: domain.name/* {replace domain.name with actual domain name}
Then the settings are: Cache Level: Cache Everything
For free account, DO NOT set Edge Cache TTL if you want CloudFlare to respect origin cache-control header. In free plan, CloudFlare does not provide “Respect Existing Headers” as setting for Edge Cache TTL. When Edge Cache TTL is set to a certain value, CloudFlare rewrites cache-control headers and caches all content (including the web pages that set as no caching) for the duration of Edge Cache TTL or for a specific duration of time for HTTP response codes other than 200 (OK) and 301 (permanent redirect).
As CloudFlare has no link to WordPress, it’s important to let CloudFlare know and purge its cache when content on WordPress site changed. To do so, install, activate and configure the plugins that help to do so, such as aptly named CloudFlare, Sunny or built-in feature of caching plugin such as W3 Total Cache.
Voila, now CloudFlare acts as CDN for all and complete WordPress resources, including HTML. You can check and verify CloudFlare caching through HTTP header.
After enabling caching in CloudFlare, in the event of you need to purge the CDN cache, it can be done directly under Caching tab. You can purge individual files (by specifying full URL), purge everything or purge by tag (Enterprise plan only).
LK is a technology writer for Tech Journey with background of system and network administrator. He has be documenting his experiences in digital and technology world for over 15 years.
Connect with LK through Tech Journey on Facebook, Twitter or Google+.


 Free VPN for iOS, Android, Windows & Mac OS X")
")
