How to Change WordPress Media Uploads Path & URL Folder Location
Before WordPress version 3.5, WordPress provides settings under Media that allow publishers to change the name and location of the folder where WordPress stores all media files, such as images, videos, audios, PDF documents and etc., that are uploaded through WordPress built-in uploader.
By default, all media files and documents uploaded through WordPress are saved in ./wp-content/uploads directory. As such, when you embed a media on web page, the URL of media always has “uploads” as part of it. You may not prefer the name “uploads”, where “images”, “data”, or even “files” may be more meaningful. But with the removal of options to set custom folder to store uploads, you need a little trick to workaround the limitation.
This tutorial shows you how to change the default media uploads location in WordPress.
Option 1: Enable the “Store uploads in this folder” and “Full URL path to files” in WordPress settings for Media
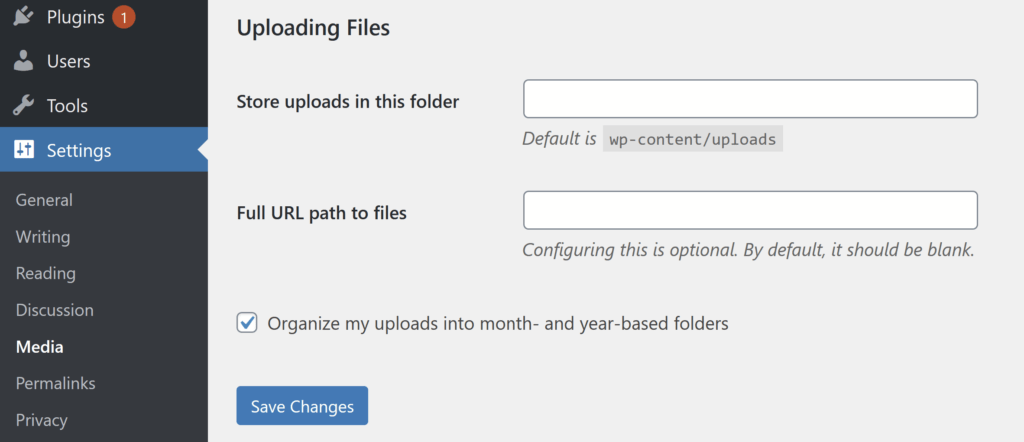
The simplest way to change the media upload storing folder is to bring back the option to change media upload path in Settings, and the easiest way to do so is by installing Upload Url and Path Enabler plugin. Despite not updating for several years, the plugin is still working fine. After activating, it will bring back the 2 settings in Settings -> Media that allow publishers to change media upload path, i.e. changing the name of uploads folder.
The first option Store uploads in this folder specifies where is the directory that WordPress uploader will store the media and files. You can input a complete full absolute path to the new folder (which is useful if you’re using CDN or subdomain to host static images and files), or relative path to WordPress root directory (without leading slash).
If the custom folder location which you set to store uploads by WordPress is too complicated and not relative to WordPress installation directory, especially when using CDN or sub-domain, and WordPress cannot determines the correct and valid URL to the content, you need to specify the Full URL path to files setting too. This where you tell WordPress how to construct the file’s URL, and it should be a valid accessible URL that when appends with file names, will point to the files. For example, https://cdn.techjourney.net/media.
Note
You can deactivate the plugin after you have set the settings. WordPress will always display the settings once any custom value for media uploads path or URL is set in the database.
Option 2: Define UPLOADS constant in wp-config.php
Edit the wp-config.php file located in the root directory of the WordPress installation, and then add the following code right before the line of /* That's all, stop editing! Happy blogging. */:
define('UPLOADS', 'files');
Above example will make “files” folder as the place to store all WordPress uploads, and the folder is located in WordPress installation folder, outside of wp-content.
In case you just want to change the name of “uploads” folder, you can define the constant as:
Rename custom_uploads_name to any folder name you prefer. And all media files will be uploaded to the folder with the new name.
Note
Once you change the uploads folder path, the URL of the media files will also be changed accordingly. WordPress should handle the new uploads automatically. However if you move the location of old media files manually, you need to replace the URL of old media files in database or add a redirect.
Option 3: Add upload_path and upload_url_path values directly in database
The uploads folder path and URL is defined in database by two fields in wp_options table, namely upload_path and upload_url_path. Once any of the options is set in the database, the options automatically appear in Settings -> Media page too.
If you have WP-CLI installed, you can quickly add the options to database with the following commands:
$ wp option set upload_path files
$ wp option set upload_url_path https://www.example.com/files
Otherwise, you can add directly in database with tools such as phpMyAdmin or mySQL client.
LK is a technology writer for Tech Journey with background of system and network administrator. He has be documenting his experiences in digital and technology world for over 15 years.
Connect with LK through Tech Journey on Facebook, Twitter or Google+.