Cloning a virtual machine, regardless of the VM is in shutdown or running state, is a very useful feature from deployment standpoint of view, which allows a system to be copied and duplicated without the need to perform installation again. In addition, cloned virtual machine also preserves current system and apps environment in production, allowing testing and evaluation to be done in a backup or UAT system before any changes or updates been applied to production virtual machine.
Virtualization products from VMware such as VMware vSphere / VMware ESXi, VMware Workstation and VMware Fusion have built-in support for closing virtual machine, where user can right click on a VM and clone it right away. In fact, VMware allows user to make a copy of virtual machine as full clone or linked clone. But not so in Hyper-V. Hyper-V does not have outright clone option available (unless you’re also running System Center Virtual Machine Manager, also known as SCVMM). In addition, while technically it’s still possible to clone a VM in Hyper-V, it only does full clone, and not linked clone.
Full clone is essentially duplicating and making a copy of original virtual machine to get an exact replica as a second virtual machine, which is completely independent of the source virtual machine. The downside of full clone is that it takes up as much disk space as the source VM.
Meanwhile linked clone is a copy of a virtual machine (VM) made from a snapshot of parent that shares virtual disks with its parent VM, hence greatly reduce the disk space required, while provides flexibility that allows both parent VM and linked clone to be used independently as ongoing changes to the virtual disk of the parent do not affect the linked clone, and changes to the disk of the linked clone do not affect the parent. The downside is that a linked clone must have access to the parent. Without access to the parent, a linked clone is disabled.
Hyper-V does not support linked clone. The closest feature Hyper-V has that resembles linked clone is differencing disk. Differencing disk, or a child disk, is a virtual hard disk you use to isolate changes to a virtual hard disk or the guest operating system by storing them in a separate file, where all ongoing changes is written to differencing disk instead of parent disk. However, if the parent disk is modified in any way, all differencing disks related to it become invalid, and all data written to the differencing disks is lost. Thus theoritically you can use differencing disk to create a linked clone, but unlike in VMware, the parent disk (and parent virtual machine) cannot be used independently.
This tutorial focuses on how to create a full clone of VM in Hyper-V. Basically, there are 2 ways to clone virtual machine of Hyper-V. The process to clone VM in Hyper-V works in most versions of Hyper-V running in Windows 8, Windows 8.1, Windows 10, Windows Server 2012, Windows Server 2012 R2, Windows Server 2016 or later.
Note
Before cloning a VM, you may want to prepare the source VM with the Sysprep (System Preparation Tool) utility to reset and remove the unique security identifier (SID) for the VM, and avoid issues such as two computers have a same IP address or two computers have the same computer name. This step is recommended for VM that is joined to Active Directory (AD) domain on the same network, but is not required most of the time, and can usually be skipped for virtual machines running as workstation (don’t join domain).
Sysprep.exe utility is normally located in the following location:
C:\Windows\System32\Sysprep
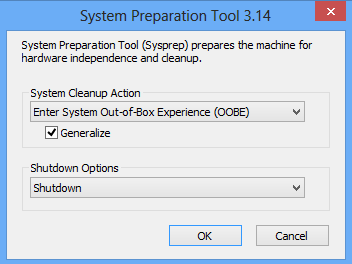
In the System Preparation Tool window, select Enter System Out-of-Box Experience (OOBE), check the Generalize checkbox’, and choose Shutdown as the shutdown options when the Sysprep process completed.
After Syspreg the virtual machine, you have to go through the entire setup process again when you boot up the virtual machine or its clones again. However, all applications installed and all user data remain exactly as it is.
Method 1: Clone Virtual Machine in Hyper-V by Export and Import
Note
Export and import VM in Hyper-V is useful when copying virtual machines to different Hyper-V hosts and you want to keep everything intact including snapshots (checkpoints). If you’re doing it on the same Hyper-V host, you need to specify a different location to store the virtual hard disk (VHD or VHDX) due to same file name with the source VHD, as the Import wizard does not provide a way to change the name of virtual machine and virtual hard disk.
In Hyper-V Manager, select the virtual machine that you want to clone (can be in running or off state).
Right click on the virtual machine, and select Export.
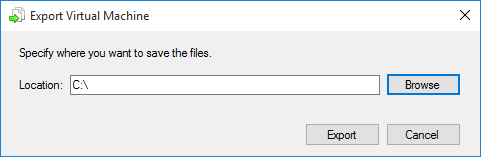
Specify the location where you want to save the exported VM. You can click on Browse button to select a folder.
Hit Export when done.
The selected virtual machine will be saved in the location you specified.
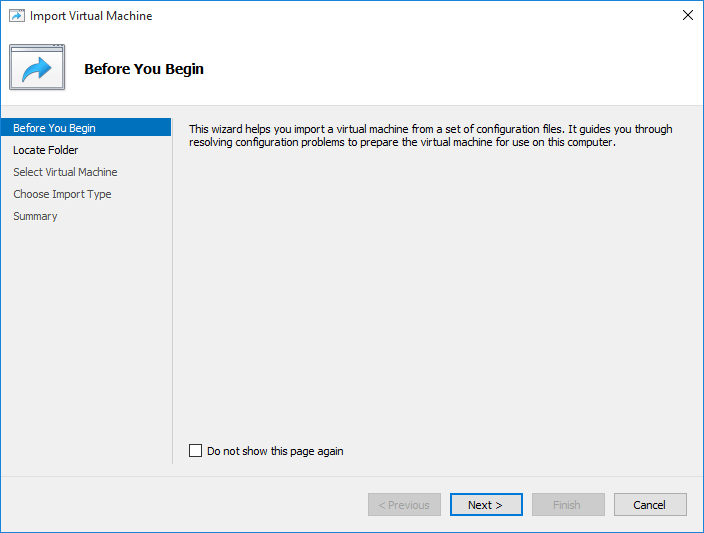
In Hyper-V Manager, select Import Virtual Machine in the Actions pane.
Click Next button.
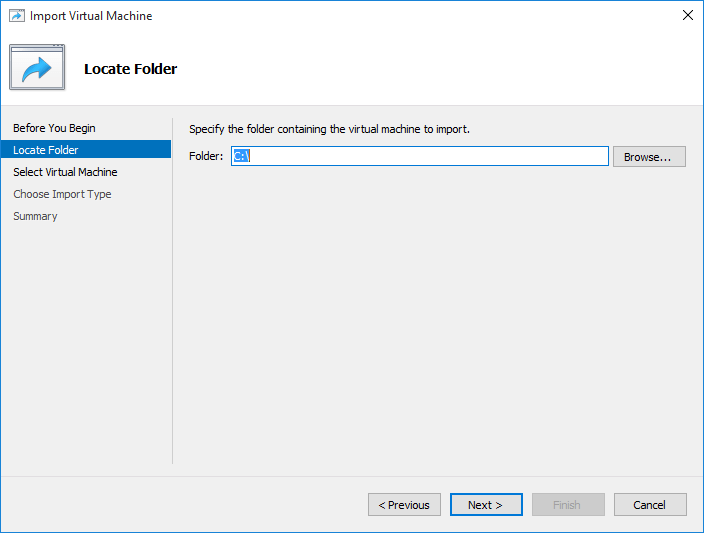
Select the folder which the source virtual machine is exported to, then hit Next button.
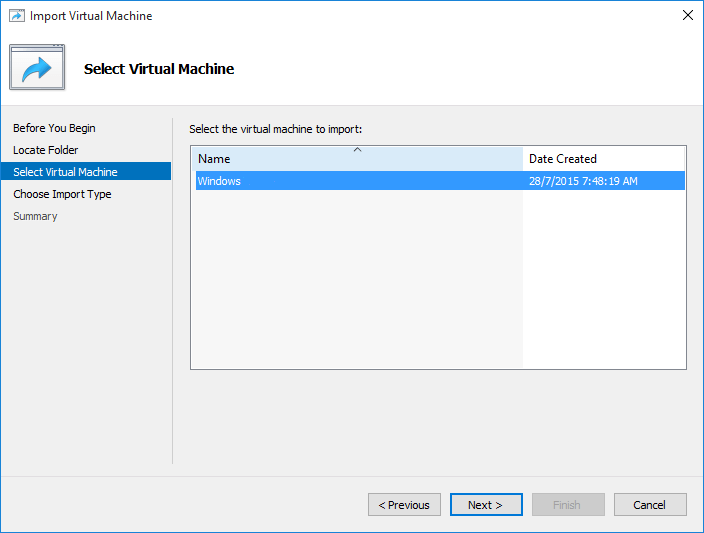
Select virtual machine to import, then hit Next button.
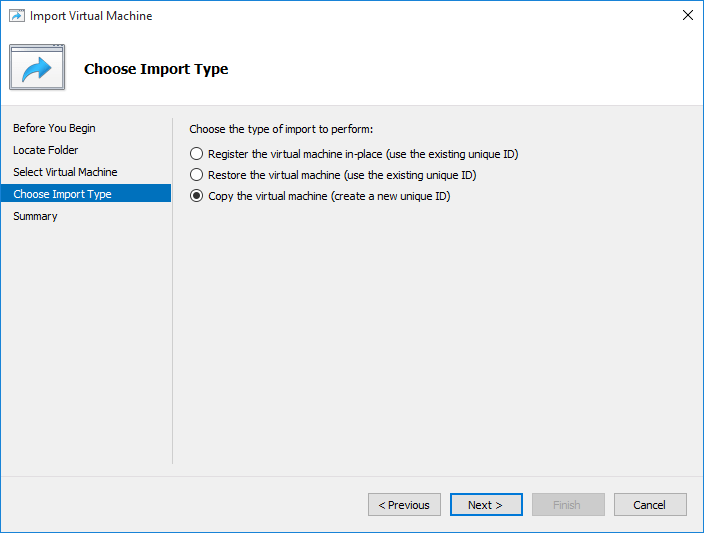
Select the radio button of Copy the virtual machine (create a new unique ID) and hit Next button.
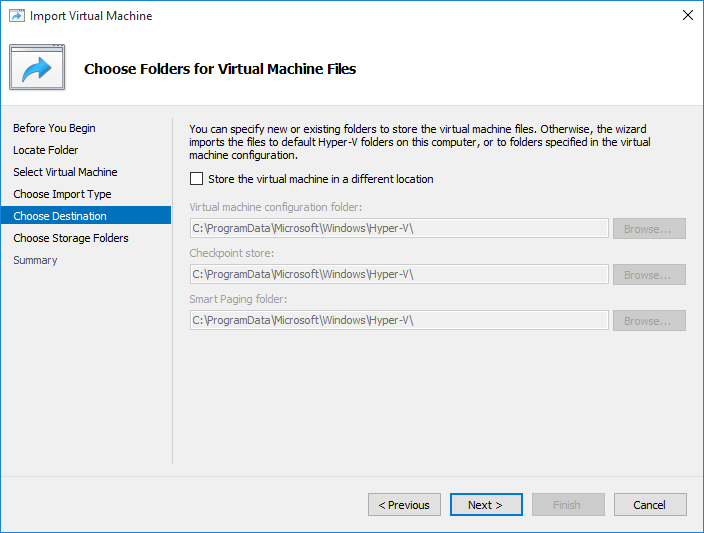
Specify a folder location to store the virtual machines configuration files. You can leave it as default as Hyper-V will create a unique ID for the cloned VM. Hit Next button.
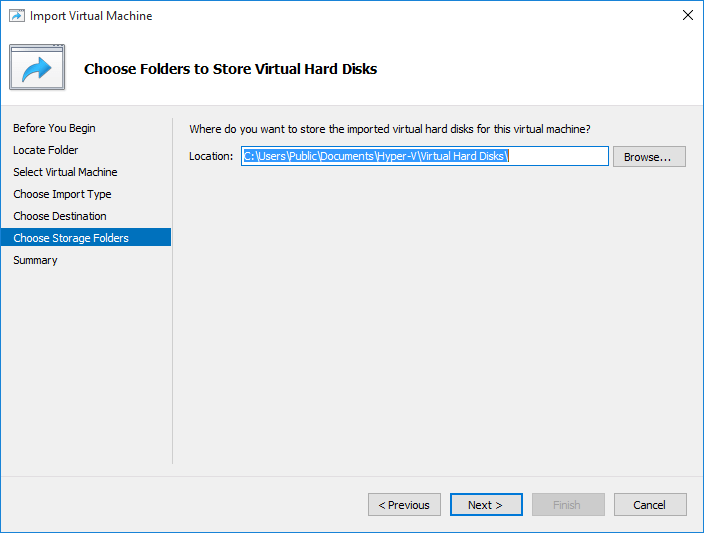
Specify a folder location to store the virtual hard disks for the cloned virtual machine. You must specify a folder location which is different from virtual hard disks of source virtual machine if you’re cloning the VM on the same host, otherwise you will encounter Hyper-V error while copying virtual hard disks to destination folder due to files already existed. Click on Next button when done.
Click on Finish button on the summary page to start the import.
Once import operation completed, a clone virtual machine that is identical to the original virtual machine is created and listed in Hyper-V Manger.
Method 2: Clone Virtual Machine by Copy the Virtual Hard Disks and Create New Virtual Machine
Locate the folder location the virtual hard disks (VHD or VHDX) of the source virtual machine with Windows Explorer, File Explorer or Command Prompt. By default, Hyper-V stores them in C:\Users\Public\Documents\Hyper-V\Virtual hard disks folder.
Copy and paste to duplicate the virtual hard disks for virtual machine that you want to clone. In Command Prompt, use “copy” command.
If necessary, rename the cloned virtual hard disks to a new file name.
In Hyper-V Manager, select New -> Virtual Machine in the Actions pane.
Follow the New Virtual Machine Wizard instruction by entering the required values and then click on Next button.
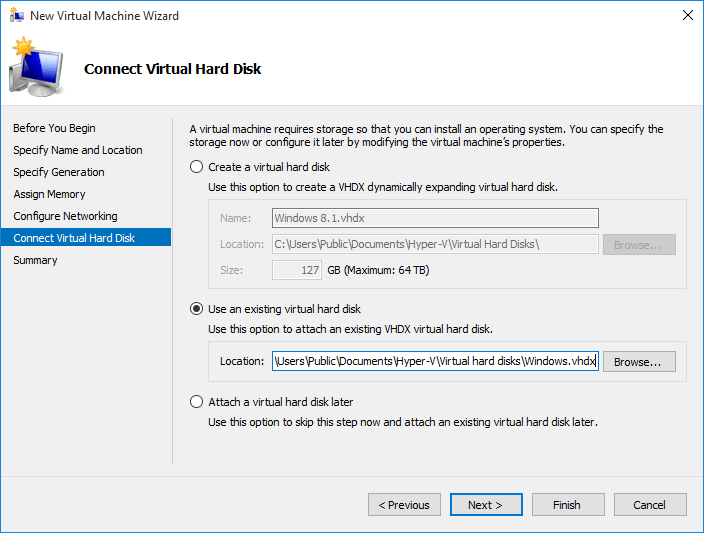
On the “Connect Virtual Hard Disk” screen, select the radio button of Use an existing virtual hard disk, then specify the location of the virtual hard disk in the Location box. You can click on Browse button to select the VHD or VHDX directly.
Complete the “New Virtual Machine Wizard”, and the clone virtual machine that is identical with origin virtual machine is created and listed in Hyper-V Manager.
In System Center Virtual Machine Manager (SCVMM), the process to clone virtual machine is much easier:
Open System Center Virtual Machine Manager console.
Go to Virtual Machine tab.
Locate and right click on the virtual machine that you want to clone, and select Clone.
The full clone of origin virtual machine is now created and listed in the SCVMM console. SCVMM also automatically Sysprep the virtual machine it cloned before deploying it.
LK is a technology writer for Tech Journey with background of system and network administrator. He has be documenting his experiences in digital and technology world for over 15 years.
Connect with LK through Tech Journey on Facebook, Twitter or Google+.