How to Delete and Remove Recovery Partition in HP Computer
HP desktop, notebook or laptop computer normally comes with a special recovery partition which caves out on a portion of local hard disk. The hidden partition, which size can comes to about 5 to 10 GB in size, usually used to store recovery information and diagnostic tools. For HP system, the special Recovery Partition, normally on D drive, is used for PC System Recovery, an easy-to-use suite of three utilities that restores individual driver and programs or restores the hard drive on the PC to original default factory condition.
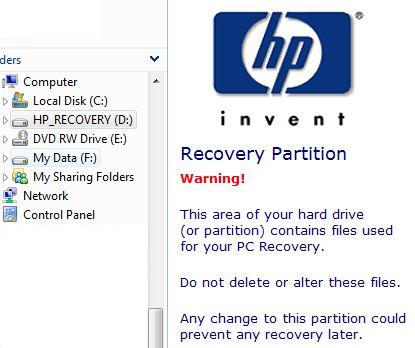
Typical message when accessing HP Recovery Partition – This area of your hard disk (or partition) contains files used for your system recovery. Do not delete or alter these files. Any change to this partition could prevent any recovery later.
The problem with recovery partition is that it’s taking up space on hard disk. Users also cannot view the contents inside the HP Recovery Partition as the data is locked and hidden. Beside, some users may prefer may prefer to depend on and use Recovery CD/DVD instead, as hard disk is still error-prone to corruption. Thus, deleting the recovery partition will unlock the disk space for normal data usage.
To delete and remove the Recovery Partition from HP system to free up disk storage space, and then merge or redistribute the space recovered to main system partition or another partition, HP provides a Recovery Manage to easily remove the recovery partition.
Note that the HP Recovery Partition on the hard drive contains a record of all software installed at the factory and shipped with this system, which includes images for the Microsoft Windows operating system, drivers and supplemental programs. Beside, without recovery partition on hard disk, users cannot recover individual operating system, drivers or applications anymore, except to rebuilt the whole system from scratch with complete and destructive reformatting of hard disk drive using set of recovery disks. Thus, it’s very important that you have created at least a set (more to pay insurance against burning or disc failure) of recovery disk before deleting recovery partition.
To remove the recovery partition, perform the following steps and actions:
If you’re using notebook computer, connect the PC to the AC power adapter.
Close all running programs, as system has to be rebooted.
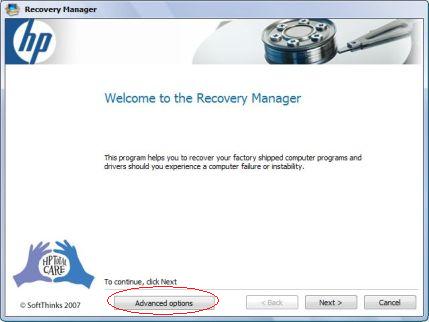
Click on Start button, then All Programs, follow by Recovery Manager or System Recovery. Then run Recovery Manager or PC Recovery.
Alternatively, if you’re using Windows Vista, Windows 7 or newer, type “Recovery” in the search field, and click on Recovery Manager when it appears in the searched program list to open the Recovery Manager window.
For “PC Recovery”, select the option to perform the PC Recovery when the recovery options are presented, and click Next. Wait for computer to restart.
Skip to next step if you’re using “Recovery Manager”.
For “PC Recovery”, click on OK button on “Welcome to PC Recovery” dialog message.
Skip to next step if you’re using “Recovery Manager”.
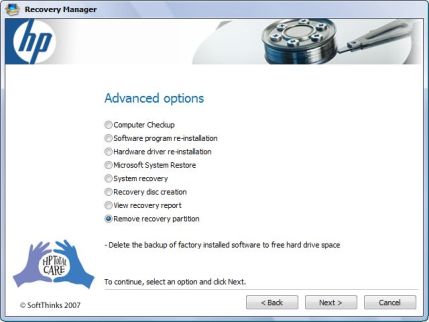
Click Advanced Options button.
Click on radio button of Remove recovery partition (or Delete Recovery Partition on PC Recovery) option and click Next.
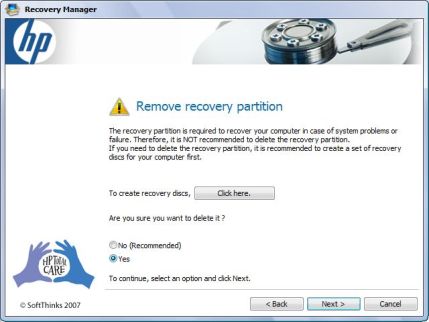
When prompted to verify that you want to delete the partition, select the Yes option, and click Next.
IMPORTANT Reminder: If you still haven’t create recovery discs, click on “Click Here” button to create a set now, else you will have to pay in order to get the discs sent to you.
PC Recovery does not prompt you for confirmation.
Removal process will start to remove the recovery partition.
IMPORTANT: Recovery Manager is new tool and able to remove recovery partition without affecting or touching existing data and system partitions. Users can then use Disk Management tool in Computer Management of Control Panel, or third party utilities such as Partition Magic or Acronis Director Suite (which in fact can be used to remove the recovery partition straight away) to extend the size of existing partition to make use of freed space. However, in the older PC Recovery, the whole disk will be formatted once recovery partition is removed. Thus, backup your data before performing the action above. And, an operating system and programs must be installed on the hard drive manually.
Restart the computer when done.
Sometimes, in some HP models, users can see “HP Backup and Recovery Manager” in the “Add and Remove Programs” or “Programs and Features” (Vista) in “Control Panel”. In this cases, uninstall “HP Backup and Recovery Manager” will remove the partition too.
LK is a technology writer for Tech Journey with background of system and network administrator. He has be documenting his experiences in digital and technology world for over 15 years.
Connect with LK through Tech Journey on Facebook, Twitter or Google+.