How to Enable Full Standard Layout for Touch Keyboard in Windows 10 (Type Fn, Esc, Alt, Tab, Up, Down)
Windows 10 has a built-in on-screen keyboard called touch keyboard that is extremely useful in some scenario. The software keyboard is designed for users who use Windows 10 in tablet mode. However, the on-screen touch keyboard will come in handy when physical keyboard is not attached, or not accessible.
The Windows 10 on-screen software keyboard is advanced and comprehensive too, with features such as split keyboard, autocorrect misspelled words, text suggestions, auto-capitalize first letter, emoji support and etc.
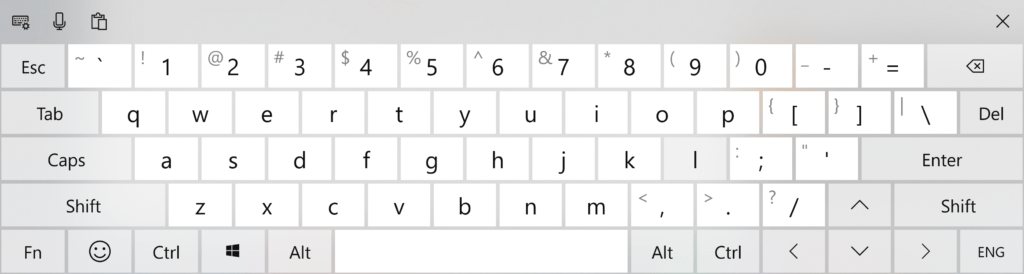
However, the default Windows 10 touch keyboard layout is simplified and is missing some special keys, such as function keys, Escape key, Tab key, Alt key, Caps key, Windows key, up and down arrow keys, and many more. If you prefer, it’s possible to display the Windows 10 touch keyboard in full standard keyboard layout, which includes all special keys and a number row, just like a physical keyboard.
This tutorial shows you how to enable and switch to full standard layout touch keyboard in Windows 10.
Bring out the touch keyboard by pressing on touch keyboard button on Taskbar.
If the touch keyboard icon is not displayed on Taskbar, right-click or long-press on the Taskbar and select Show touch keyboard button.
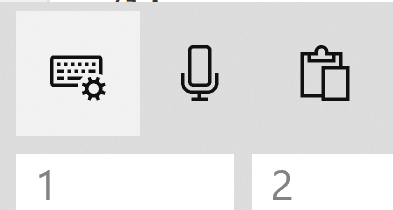
Click or tap the touch keyboard options icon on the top left corner of the on-screen keyboard.
Select the standard full keyboard icon, which looks the densest and should place 4th from left.
Voila, now you can type with on-screen standard keyboard whatever you can with physical keyboard.
Note
In older version of Windows 10, you may need to go to Settings -> Devices -> Typing and enable Add the standard keyboard layout as a touch keyboard option.
LK is a technology writer for Tech Journey with background of system and network administrator. He has be documenting his experiences in digital and technology world for over 15 years.
Connect with LK through Tech Journey on Facebook, Twitter or Google+.
 If the touch keyboard icon is not displayed on Taskbar, right-click or long-press on the Taskbar and select Show touch keyboard button.