How to Install & Use Cloudflare WARP VPN on Windows / Linux / macOS / OpenWRT
Cloudflare WARP is a VPN (Virtual Private Network) service that is intended to make Internet safer, more private and faster for everyone. As such, WARP has no bandwidth restriction and is completely free.
However, Cloudflare has officially released mobile WARP client for Android and iOS devices (through 1.1.1.1 app). While WARP desktop clients for Windows and macOS are in the work and open for beta testing, not everyone has access to it yet. If you’re using Linux, your waiting time may be even longer, not to mention WARP client for embedded devices such as router running OpenWRT.
As Cloudflare WARP is essentially using WireGuard VPN protocol, an easy, simple, modern, fast and secure VPN implementation, to create secure point-to-point tunnel connections, it means that it’s possible to connect to and use Cloudflare WARP by using a WireGuard client.
If you can’t wait for official client, follow the tutorial to install the official WireGuard client to use Cloudflare WARP VPN service.
What you need?
Official WireGuard client from wireguard.com (available for Windows, macOS, Ubuntu, Android, iOS, Debian, Fedora, Mageia, Arch, OpenSUSE, Slackware, Alpine, Gentoo, Exherho, NixOS, Nix on Darwin, Red Hat Enterprise Linux, CentOS, FreeBSD, OpenBSD, Termux, Void, Adélie Linux, Source Mage, Buildroot, LinuxKit, AstLinux, Milis, OpenWRT and etc.)
wgcf utility from github.com which is used to create and manage CloudFlare WARP accounts, assign license keys, and generate WireGuard profiles.
How to Setup Cloudflare WARP VPN with WireGuard Client
The tutorial uses wgcf as the name of wgcf utility executable, which may not be the actual file name. Change the executable name accordingly if the one you downloaded is named differently.
Extract the wgcf utility to a folder/directory.
Open a Command Prompt or terminal window, and navigate (cd) to the path location of wgcf executable.
If it’s your first time using Cloudflare WARP, you need to register and create a new device account with WARP. To do so, run the following command:
wgcf register
The command will produce wgcf-account.toml file which stores the details of Cloudflare WARP account. If you already have the account, you can skip this step.
Next, generates a WireGuard profile from the current Cloudflare Warp account with the following command:
wgcf generate
The WireGuard profile generated is saved as wgcf-profile.conf.
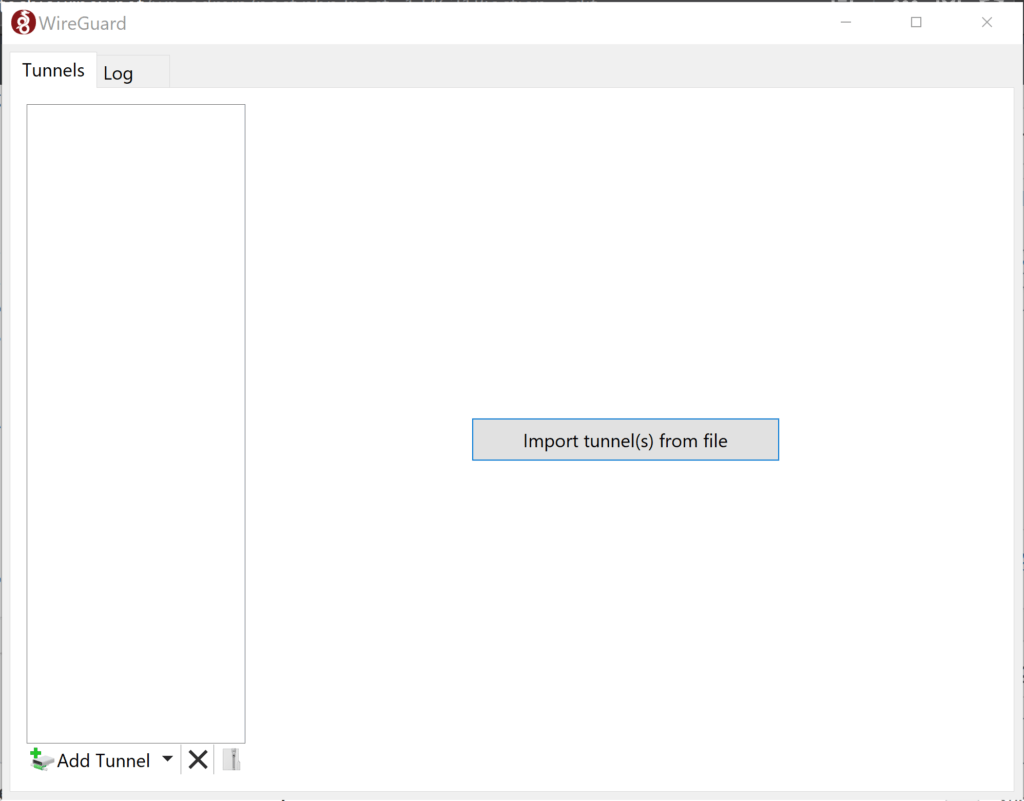
Open WireGuard client.
Click on Import tunnel(s) from file (if you already have other VPN configured, you need to click “Add Tunnel” on the bottom left corner and select the import option from drop down menu).
Select wgcf-profile.conf file and hit the Open button to import it to WireGuard client.
You may want to change the file name first before importing, as the tunnel name will take the name of the profile imported.
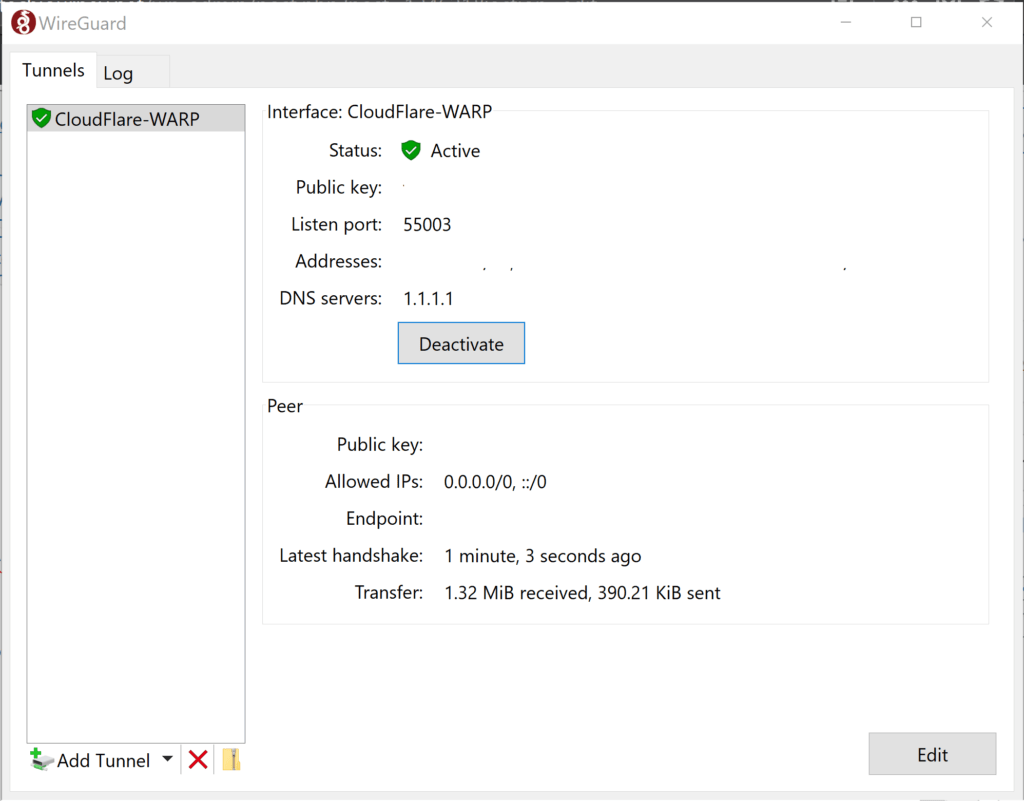
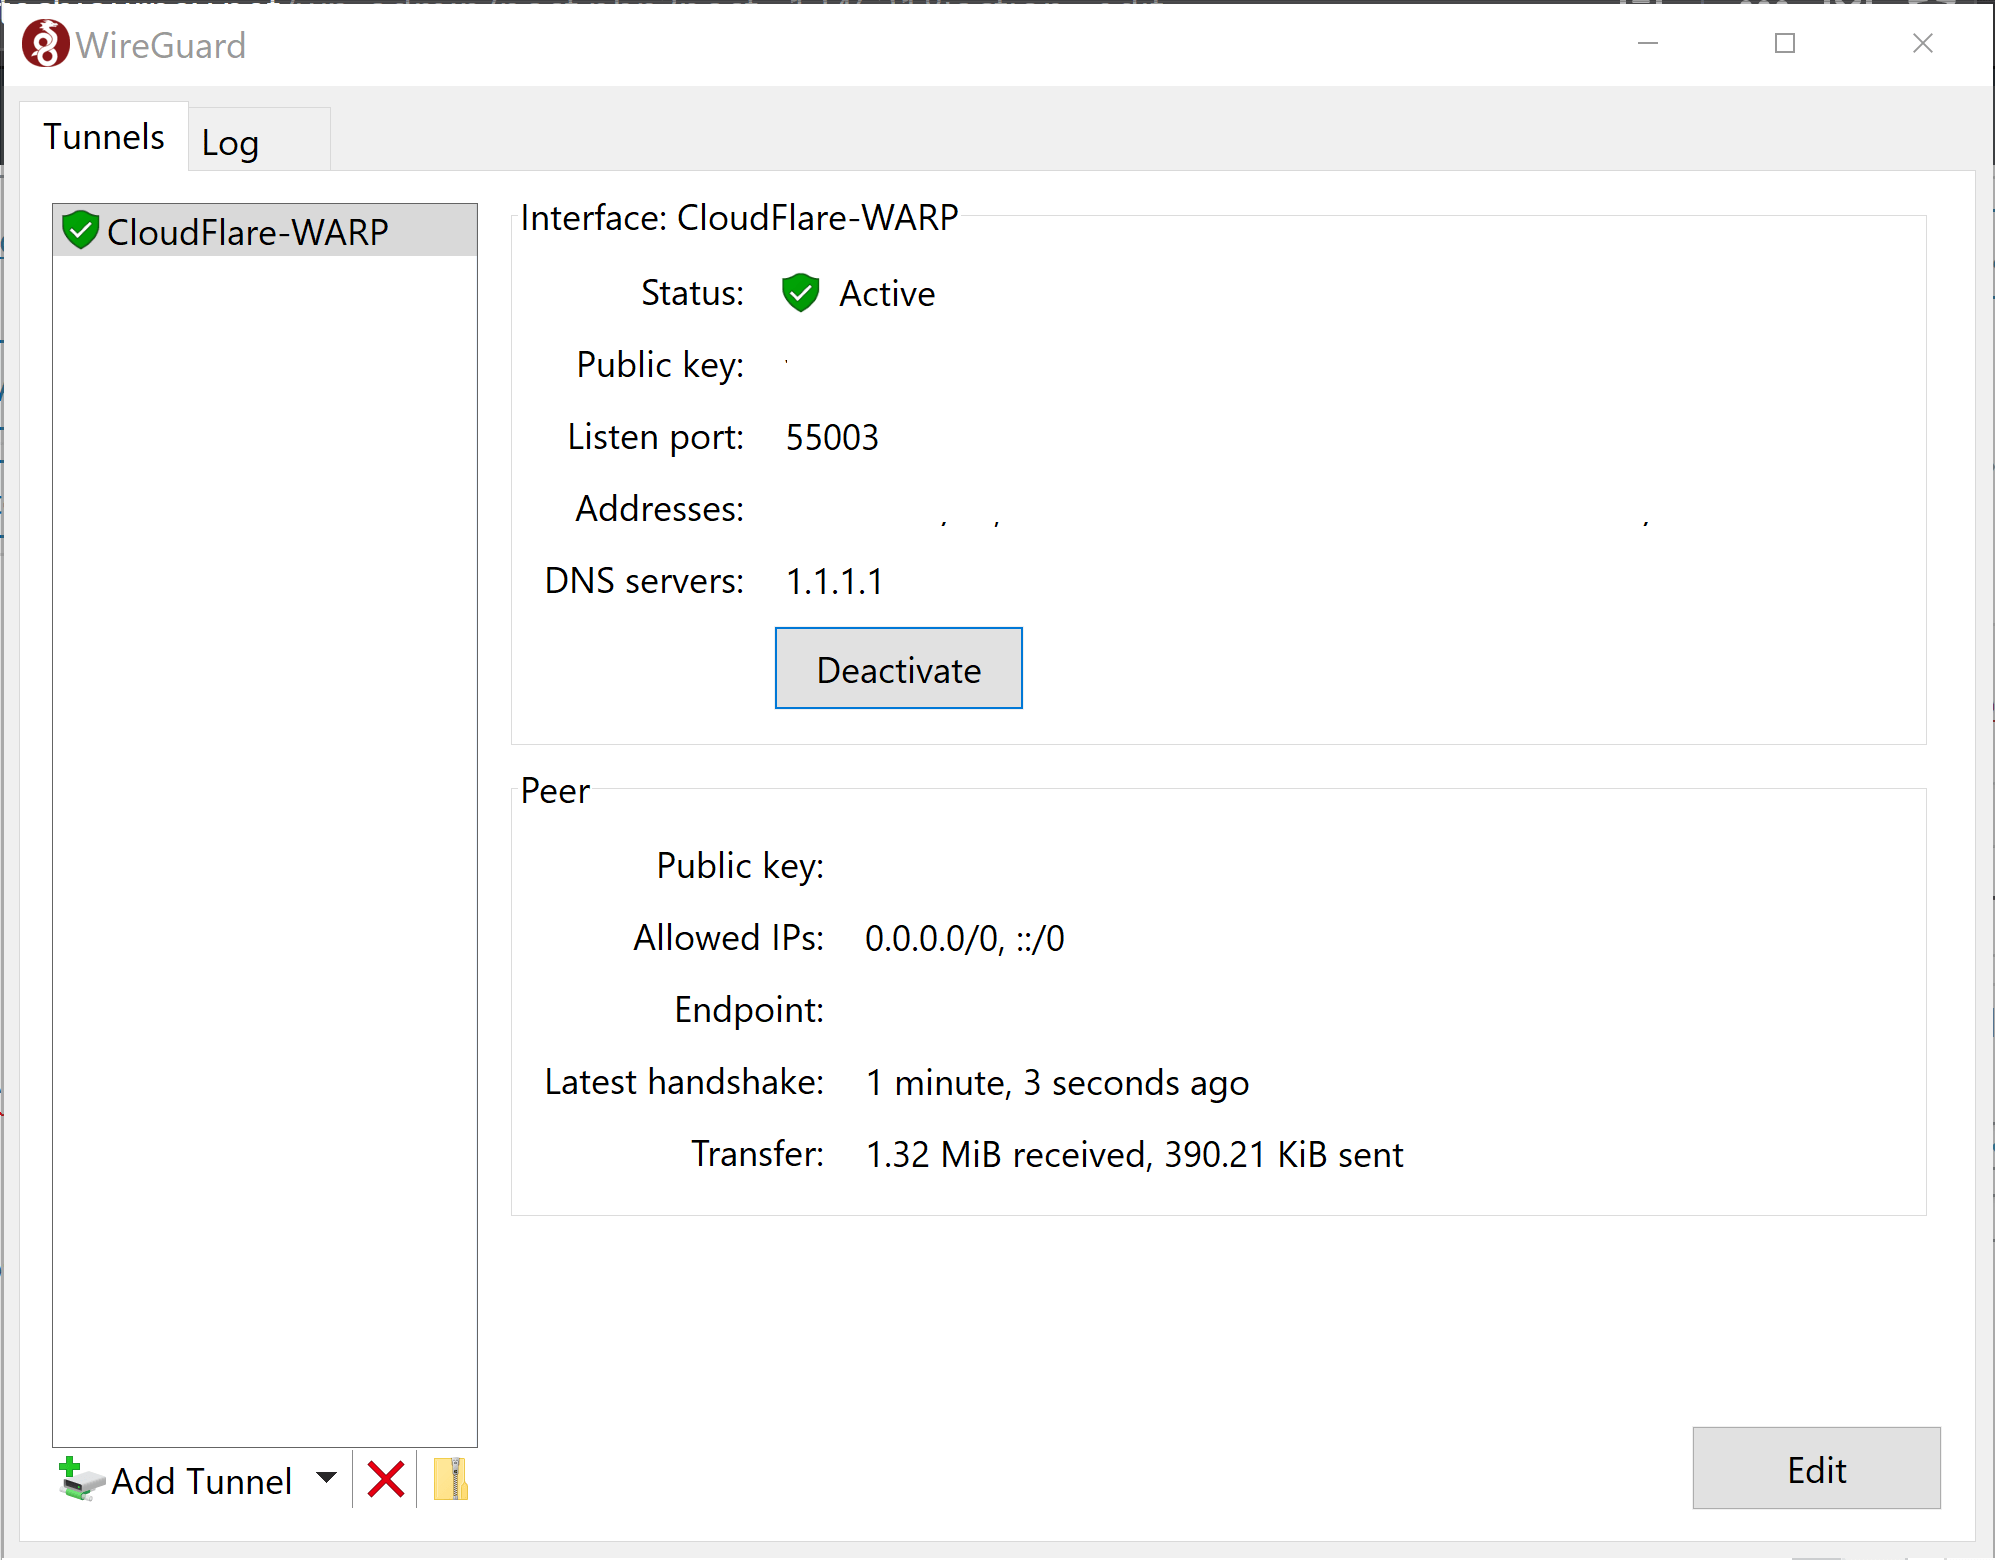
Connect to Cloudflare WARP VPN by clicking Activate in WireGuard client.
Use Existing Cloudflare WARP Account
You may already use Cloudflare WARP+ on mobile device, where you earn that WARP+ bandwidth credit through referral or subscribe to unlimited WARP+. To reuse existing WARP+ device account through WireGuard, retrieve the WARP+ license key from the 1.1.1.1 app (go to Settings -> Account and copy the value of the Key).
Once you have the license key, edit the wgcf-account.toml to input the license key and run the update command:
wgcf update
Alternatively, you can use an environment variable to pass the license key to wgcf utility:
Note that you can also use the same WARP+ account on the maximum limit of 5 active linked devices.
Now, you can enjoy and use Cloudflare WARP VPN on desktop plus any device and platform supported by WireGuard for better, faster, more secure and more private Internet.
LK is a technology writer for Tech Journey with background of system and network administrator. He has be documenting his experiences in digital and technology world for over 15 years.
Connect with LK through Tech Journey on Facebook, Twitter or Google+.
 Free VPN for iOS, Android, Windows & Mac OS X")


 Update Client in CentOS")
")