How to Use Let’s Encrypt SSL Certificate Automatically in Virtualmin / Webmin
Since Webmin 1.78 and Virtualmin 5.0, Webmin can request an SSL certificate for itself from Let’s Encrypt, the free, automated and open certificate authority (CA), if you have the letsencrypt client command installed. The built-in Let’s Encrypt feature in Webmin and Virtualmin makes it very easy to request, authenticate the domain ownership, create, generate, install, apply and renew SSL certificates and private keys for various virtual servers (domains and websites).
This tutorial guides you on how to configure and set up Virtualmin and Webmin to handle and manage everything about Let’s Encrypt SSL certificates.
Let’s Encrypt issues Domain Validated (DV) certificates that required you to verify the ownership of domains. The implementation of Let’s Encrypt on Webmin and Virtualmin is using the webroot plugin as the authentication method.
Webroot plugin works by creating a temporary file for each of your requested domains in ${webroot-path}/.well-known/acme-challenge. Then the Let’s Encrypt validation server makes HTTP requests to validate that the DNS for each requested domain resolves to the server hosting the website for the domain.
Configure and Setup Let’s Encrypt in Webmin / Virtualmin
Login to Webmin / Virtualmin.
Go to Webmin tab.
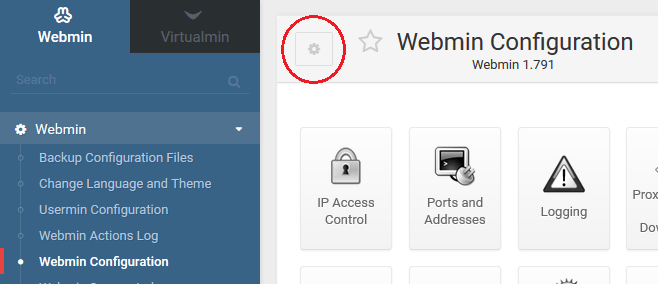
Go to Webmin -> Webmin Configuration.
Click or tap on Module Config link or button on the top left corner.
In the text box for Full path to Let’s Encrypt client command, enter the full path to the Let’s Encrypt client executable. Click or tap Save when done.
If you install Let’s Encrypt through cloning from Git, you will have both letsencrypt-auto script in the download directory and letsencrypt binary in a less promoninet location. If you install Let’s Encrypt through system package, only letsencrypt binary is available.
letsencrypt-auto accepts the same flags as letsencrypt and can be used interchangeably; letsencrypt-auto installs all of its own dependencies and updates the client code automatically, and thus it’s comparatively slower and larger than letsencrypt.
For Let’s Encrypt client obtained manually the comes with letsencrypt-auto, the client (letsencrypt binary) is available inside the virtual environment it created: /home/username/.local/share/letsencrypt/bin/letsencrypt.
Request and Install Let’s Encrypt SSL Certificate for Virtual Servers / Domains
Webmin / Virtualmin supports name-based virtual hosts with SSL as Apache HTTPD is built with SNI (Server Name Indication) extension.
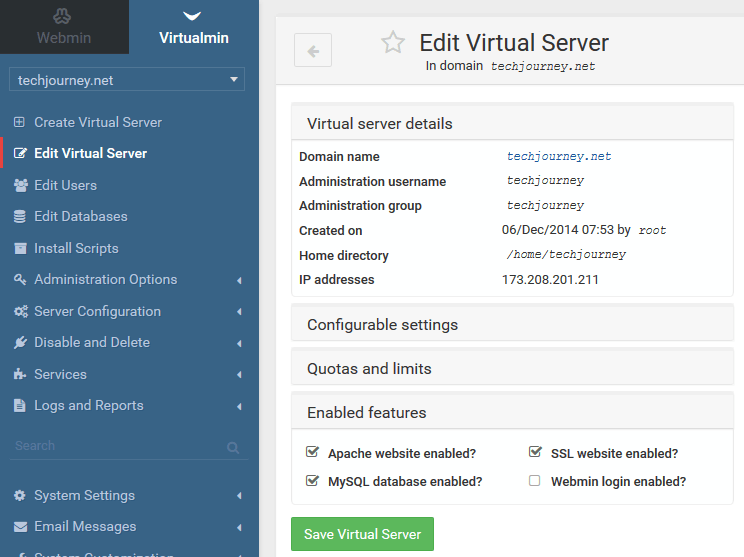
Go to Virtualmin tab.
Select the virtual server / domain which you want to enable SSL protocol with SSL certificate from Let’s Encrypt from the drop-down list.
Select Edit Virtual Server.
Go to Enabled Features.
Check the SSL website enabled?. Hit Save Virtual Server when done.
Note
If you can’t see the “SSL website enabled?” option, go to System Settings -> Features and Plugins to enable the SSL website.
After you enabled SSL for your virtual host, a self-signed certificate is automatically created and applied. The self-signed certificate will be replaced and overwritten by SSL cert from Let’s Encrypt.
Now go to Server Configuration -> Manage SSL Certificate.
Go to Let’s Encrypt tab.
Under Request certificate for, select the radio button for Domains associated with this server which allows Virtualmin to automatically decide the domains for the SSL certificate (typically the root domain and its www subdomain), or Domain names listed here, where you can list the domain names (one per line) that you want to include in the SSL certificate manually.
Virtualmin also supports auto renewal of Let’s Encrypt certificate. To do so, select the radio button next to the empty textbox for Months between automatic renewal option, then enter a number between 1 to 3 months in the text box.
Let’s Encrypt SSL certificate has the lifetime of only 90 days before its expiry. So you have to renew the SSL cert before 3 months is up to ensure the HTTPS visits to to your websites are uninterrupted.
Hit Request Certificate when done.
Once done, Virtualmin will automatically install SSL certificate and configure the web server to use the new certificate and key. You can now visit your website via HTTPS secure connection, which should automatically trusted by most web browsers, and see it protected with a padlock.
Redirecting HTTP Web Traffic to HTTPS SSL Connection
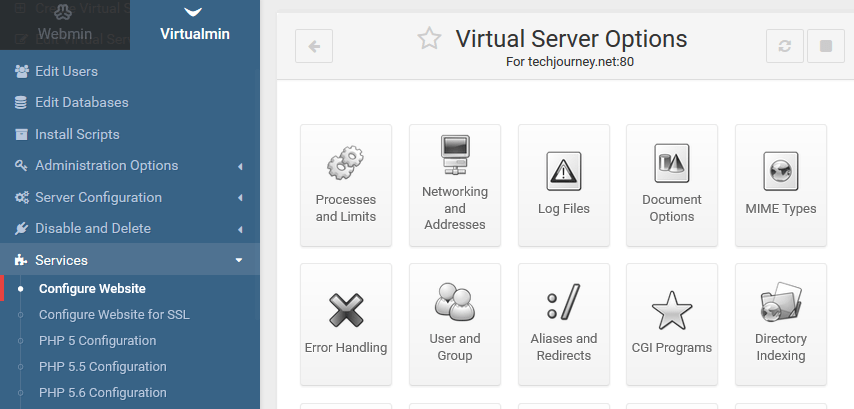
After enabling the SSL, you may want to ask web server to automatically redirect all HTTP connections to HTTPS connections for the domain. Virtualmin has built-in capability to set this up. To do so (make sure the correct virtual server is still selected in Virtualmin), go to Services -> Configure Website (make sure that it’s NOT “Configure Website for SSL”). Then, select Aliases and Redirects
Under Permanent URL redirects, enter / (slash) for From textbox, and https://www.yourdomainname.com (your website URL with HTTPS in full) in To textbox.
Click or tape Save when done and then Apply Changes.
Secure Webmin, Usermin, Postfix, Dovecot and ProFTPD with Let’s Encrypt SSL Cert
You can use the Let’s Encrypt SSL cert in Webmin (if the matching domain name is included in the SSL certificate, so that it is presented to the master admin and domain owners accessing the Virtualmin web user interface on port 10000; Usermin, so that it is presented to mailbox users accessing the webmail interface on port 20000; in Dovecot for SSL-protected IMAP and POP3 connections; in Postfix for SSL-protected SMTP connections by mail clients and in ProFTPD for SSL-protected FTP connection by clients.
To do so, go to Server Configuration -> Manage SSL Certificate. In Current Certificate tab, click or tap Copy to Webmin, Copy to Usermin, Copy to Dovecot, Copy to Postfix, and/or Copy to ProFTPD for each application you want to use the Let’s Encrypt certificate.
Unless the SSL certificate has included the domain name which Webmin and Usermin is running on, you need not copy the Let’s Encrypt cert used in Virtual Server to
Alternative to Secure Webmin and Usermin Using Let’s Encrypt
Webmin has another way to request and generate Let’s Encrypt cert to secure Webmin, useful if your Webmin and Usermin root is in a sub-domain which requires SSL certificate of their own.
Go to Webmin -> Webmin -> Webmin Configuration -> SSL Encryption. Then go to Let’s Encrypt tab. The screen is similar to how you generate the Let’s Encrypt cert for virtual host, where hostnames for certificate is automatically detected by Webmin and you can add more, except that you may need to specify the website root directory for validation file as the domain name of Webmin and Usermin root may not be accessible via A record in DNS. Also ensure that Copy new key and certificate to Webmin? option is set to Yes to use the newly created cert in Webmin.
To use the new cert in Usermin, go to Webmin -> Webmin -> Usermin Configuration -> Current Certificate, and hit Copy Certificate from Webmin to copy the SSL certificate, private key, CA cert and other settings that Webmin is using.
LK is a technology writer for Tech Journey with background of system and network administrator. He has be documenting his experiences in digital and technology world for over 15 years.
Connect with LK through Tech Journey on Facebook, Twitter or Google+.
 NoteIf you can’t see the “SSL website enabled?” option, go to System Settings -> Features and Plugins to enable the SSL website.After you enabled SSL for your virtual host, a self-signed certificate is automatically created and applied. The self-signed certificate will be replaced and overwritten by SSL cert from Let’s Encrypt.