There Are No Previous Versions Available (Not Showing / Not Listed) in Windows 10
In Windows 10, the Previous Versions feature may not be working properly on a disk drive, partition or volume, despite the Shadow Copy (also known as Volume Shadow Copy or Volume Snapshot Service or VSS) and/or System Restore is enabled, configured and working correctly.
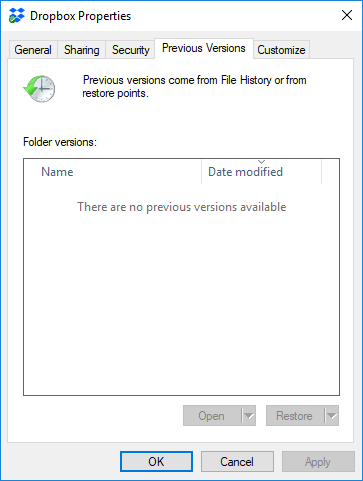
When the Previous Versions is not working properly, the Previous Versions tab is showing “There are no previous versions available”, despite System Restore feature has been enabled in “System Protection”, and at least one or more System Restore points / Shadow Copy snapshots have been created and existed in the “System Restore” or “Shadow Copies” listing, and System Restore took up increasing disk space. When there are no previous versions available, you can’t view, recover or restore old files and/or folders through the Previous Versions feature.
The Previous Versions also appears to be not listed for system drive (e.g. C:\) only. In fact, if you just manually created a restore point, the corresponding previous version may appear for a short while, before disappearing again. Previous Versions feature is working fine for other non-system drives such as additional or secondary disk drives, volumes or partitions, portable hard disks, USB flash drives and etc. The issue behavior happens too on just installed out-of-the-box Windows 10 operating system.
The behavior of Previous Versions not listed and not available for some drives in Windows 10 may be by design i.e. System Restore points on system drive are ignored by Previous Versions. Microsoft has added a new feature called File History that performs the backup to another drive for safer safeguard and works with Previous Versions too. However, the addition of File History does not deny the fact that System Restore still works fine and alive in Windows 10, and GUI of Previous Versions should include the files and folders that are backed up and should be listed for users to selectively choose to view or restore without having do a complete System Restore, as how it works in Windows 7.
Workaround to Recover Files in VSS Snapshots
In order to view or recover any files saved by System Restore or Shadow Copy, and if Previous Versions indicates that there are no previous versions available and thus does not list them, you can make use of several third party tools such as ShadowExplorer, ShadowCopyView, System Restore Explorer, Shadow Copy Explorer and Previous Version File Recoverer that let you browse and view various System Restore points or Shadow Copies to recover older version files and folders at the point of time the snapshot was taken.
Fix for Previous Versions Not Available in Windows 10
If you prefer to use just the built-in GUI of Previous Versions without the help of third party utilities, you can manually create a Previous Versions snapshot by running the following command in Administrator’s Command Prompt, which makes use of Win32_ShadowCopy class in WMI.
wmic shadowcopy call Create Volume=C:\
Change the drive letter if applicable.
Above command will create Shadow Copy snapshot which will be listed only on Previous Versions. It will not show up in System Restore recovery points, and thus cannot be used to perform System Restore for Windows OS.
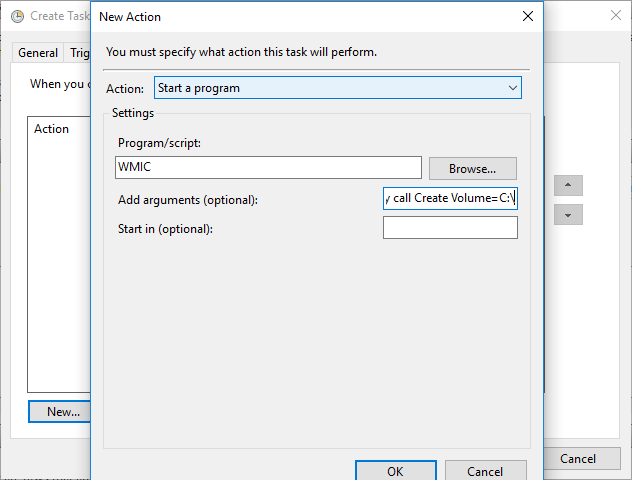
If you want Windows 10 to automatically create a snapshot of your drive for Previous Versions, you can create a scheduled task using Task Schedule.
Open Task Scheduler.
Hit Create Task.
Give the new task a proper Name (e.g. Shadow Copy C Drive) in General tab.
In Triggers, select New and set the schedule or time which you want the task to run automatically.
In Actions tab, hit New then select Start a program for Action. In the text box of Program/script, enter WMIC, while enter shadowcopy call Create Volume=C:\ in the text box of Add arguments (optional).
LK is a technology writer for Tech Journey with background of system and network administrator. He has be documenting his experiences in digital and technology world for over 15 years.Connect with LK through Tech Journey on Facebook, Twitter or Google+.
")
 vs Recycle Bin in Windows")
 Backup Files in Windows")
 in Windows with ShadowExplorer")
 in Windows")

