In Windows, UPnP is named as Network Discovery since Windows Vista. Network Discovery allows your computer to see other network computers and devices and allows people on other network computers to see your computer, which makes it easier to share files and printers. Network Discovery is disabled by default for Public network location (as Public or Guest network profile) in all editions and versions of Windows, including Windows Vista, Windows 7, Windows 8, Windows 8.1 and Windows 10, as Windows Firewall blocks network discovery. Windows assigns enabled Network Discovery in Home, Work or Domain network location (as Private network profile), which the network connection is placed into when you chose to turn on sharing and connect to devices when connecting to a network.
In whatever cases, you can always enable or disable Network Discovery for each of the Network Location regardless of their predefined state.
To enable and turn on UPnP service or Network Discovery in Windows, simply follow this steps:
- Click on Start button (or WinX Power User menu in Windows 8/8.1), then select Control Panel.
- Click on Network and Internet link, and then click on Network and Sharing Center.
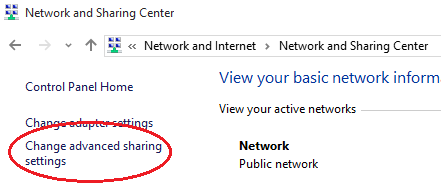
- In Windows 7, Windows 8, Windows 8.1, Windows 10 or later, click Change advanced sharing settings in the left pane.
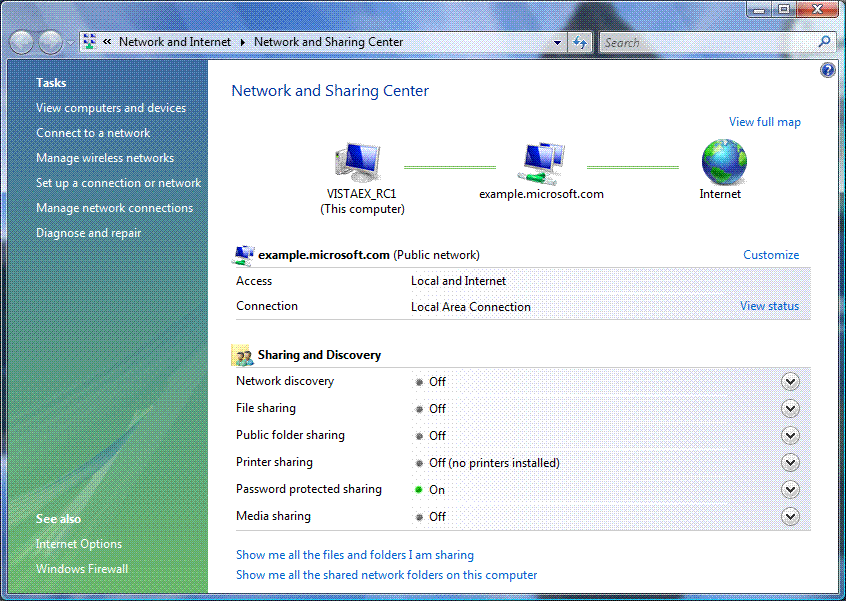
In Windows Vista, the Sharing and Discovery settings are displayed directly.
- Click on the corresponding chevron icon
to expand your current network profile.
- Click Turn on network discovery, and then click Apply or Save changes. If you are prompted for an administrator password or UAC confirmation, type the password or provide confirmation.
To disable and turn off UPnP service or Network Discovery in Windows, simply repeat above steps but select Turn off network discovery.
Note that network policy settings might prevent you from completing these steps if your computer is connected to a network.
