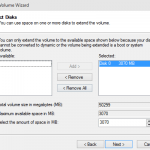
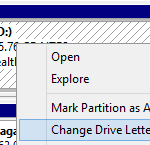
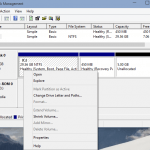
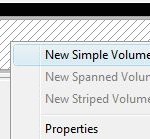
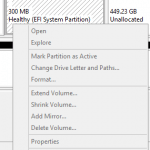
However, Disk Management extension in Microsoft Management Console (MMC) does not always work properly. Problems faced by users including random grayed out or disabled of Extend Volume and Shrink Volume options, as Disk Management snap-in prohibits you from inadvertently performing actions that may result in data loss.
If you’re getting frustrated with Disk Management, try out DiskPart utility, a text-mode command line interpreter based on scripts to manage, create, delete and resize objects such as disks, partitions and volumes in Windows 10, Windows 8.1, Windows 8, Windows 7, Windows Vista, Windows XP, Windows Server 2003 and Windows 2000. (The last 3 operating systems listed earlier do not come with DiskPart.exe by default, so users need to download and install DiskPart manually).
As DiskPart is a command line utility, users will have to use various commands to instruct DiskPart to perform a disk related task. Users can use HELP command to list out all available commands for DiskPart. For various options for a command, append the command name to HELP, i.e. HELP [command], or simply type the command name itself only. For detailed explanation and guide to use the command, append the full command syntax to the HELP, i.e. HELP [full command syntax with option].
For easy reference and getting start guide, here’s some simple operation that you can perform on your hard disk and partition or volume with DiskPart. But before you continue, make sure that you backup important files and programs in case of any failure.
- Start and Run DiskPart
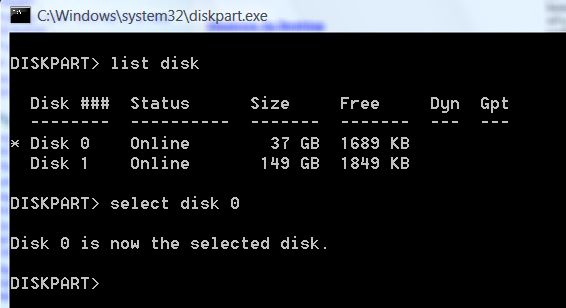
To run DiskPart, type DiskPart.exe in Start Search in Windows Vista, Windows 7, Windows 8, Windows 8.1 and Windows 10, or in Run command text box in Windows 2000, Windows Server 2003 and Windows XP finished off by Enter key. A command prompt window with DISKPART shell is loaded.
- List all disks on system in DiskPart
To all your available installed hard disks on the system, simply type list disk, and hit Enter.
- Select and set target disk to use in Disk Part
To set and select a disk which you want to work with in DiskPart, use the following command syntax:
select disk <disk number (###)>
The disk number is retrieved from “list disk” command.
- Create a partition with DiskPart
If the hard disk is empty without any partition or still has unallocated space, a partition can be created on it with the following command syntax:
create partition <partition type> [size=<n>] [offset=<n>] [id={<byte> | <guid>}] [align=<n>] [noerr]
The partition types that are supported are primary partition (the only bootable type, but limited to four per hard disk), extended partition (also limited to four per hard disk to supplement those need more than 4 primary partitions), logical drive (to define within extended partition to allow many volumes to be created), EFI system partition and MSR (Microsoft Reserved partition). Note that not all options are available for all partition type.
Example: create partition primary size=1000 (Create a primary partition with the size of 10GB.)
- Create a volume in DiskPart
DiskPart allows user to create RAID (RAID-5) volume using three or more specified dynamic disks, simple volume or striped volume using two or more specified dynamic disks. The syntax for the command is:
create volume <volume type> [size=<n>] disk=<n>,<N>,<n>[,<n>[,…]] [align=<n>] [noerr]
Example: create volume raid size=1000 disk=1,2,3 (Create a RAID-5 array volume with 1 GB (1000MB) using disk 1, 2 and 3.)
- List all volumes in DiskPart
Use the following command to list all volumes in order to check which number is associated with the volume we want to work with:
list volume
- Select a volume to manage in DiskPart
Use the following command to select a volume in order to manage (shrink, extend, delete format) the volume:
select volume <number>
The number for the volume is retrieved from “list volume” command.
- List all partitions in DiskPart
Use the following command to list all partitions in order to check which number is associated with the partition we want to work with:
list partition
- Select a partition to manage in DiskPart
Use the following command to select a volume in order to manage (shrink, extend, delete format) the partition:
select partiton <number>
The number for the partiton is retrieved from “list partition” command.
- Shrink a volume (reduce size of partition) in DiskPart
To reduce the size of the volume with focus by the specified amount and makes free disk space available from unused space at the end of the volume, use following command syntax:
shrink [desired=<n>] [minimum=<N>] [nowait] [noerr]
Example: shrink desired=500 minimum=250 (Shrink volume by 500 MB, with 250 MB as minimum size to be freed if not possible.)
To check and determine how much is the maximum number of bytes that a volume can be reduced by (the free space that is available on the volume), use following command:
shrink querymax [noerr]
- Extends the volume or partition (increase size) in DiskPart
To extend the volume or partition with focus and its file system into free (unallocated) space which can be used to store data on a disk, use following command syntax:
extend [size=<n>] [disk=<n>] [noerr]
The above command works on when both volume or partition is selected.
Example: extend size=500 (Increase the size of current partition or volume selected by 500MB.)
- Delete partition or volume with DiskPart
Note that system, boot or any volume/partition that contains the active paging file or crash dump (memory dump) cannot be deleted. And users must select a partition or volume before start deletion operation. Dynamic disks should be removed by using “delete volume” command.
delete partition
delete volume
- Format a volume or partition in DiskPart
Simply select a partition or volume, and then type format.
