To be able to telnet to another remote computer, a Telnet client is needed. Beginning from Windows Vista, including in Windows 7, Windows 8, Windows 8.1 and Windows 10, Telnet client is not installed by default. The following guided tutorial will install Telnet client in Windows.
- Click on Start button or Power User Quick Access menu in Windows 8 / 8.1 / 10, then go to Control Panel -> Programs.
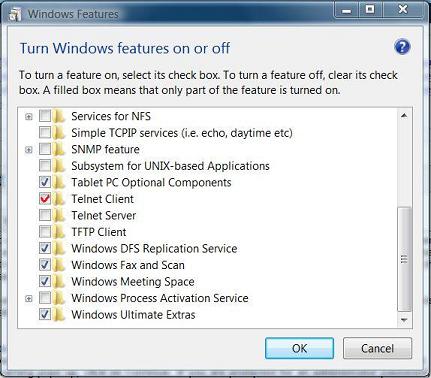
- Under the Programs and Features section, click Turn Windows features on or off. If User Account Control permission confirmation request warning pops up, click on Continue. If you are prompted for an administrator password, type the password.
- In the Windows Features dialog box, select (tick) the Telnet Client check box.
- Click OK. Wait for the installation to finish.
Once installed, you can find Telnet Client by typing Telnet in Start Search.


