How to Whitelist an Email Domain in Microsoft Office 365 Exchange Online (Outlook)
Office 365 is one the most popular cloud-based Software as a Service (SaaS) for individual end-users and large corporations alike. And one of the major component of Office 365 for commercial organizations is hosted Exchange Online, which hosts the email server and deliver (send and receive) email messages for the users.
Exchange Online of Office 365 has built-in spam protection to reduce the junk mails, spam emails, phishing emails, bulk mails and malicious content. However, some legitimate and authorized email messages can be misidentified as spam and automatically moved to Junk Email folder in Outlook. In order to avoid the recurrence of false positive, it’s imperative to whitelist whatever domains where the emails that mistakenly marked as spam by Exchange and Outlook so that all emails that are originating from the domain can bypass the spam filter and are delivered to Inbox.
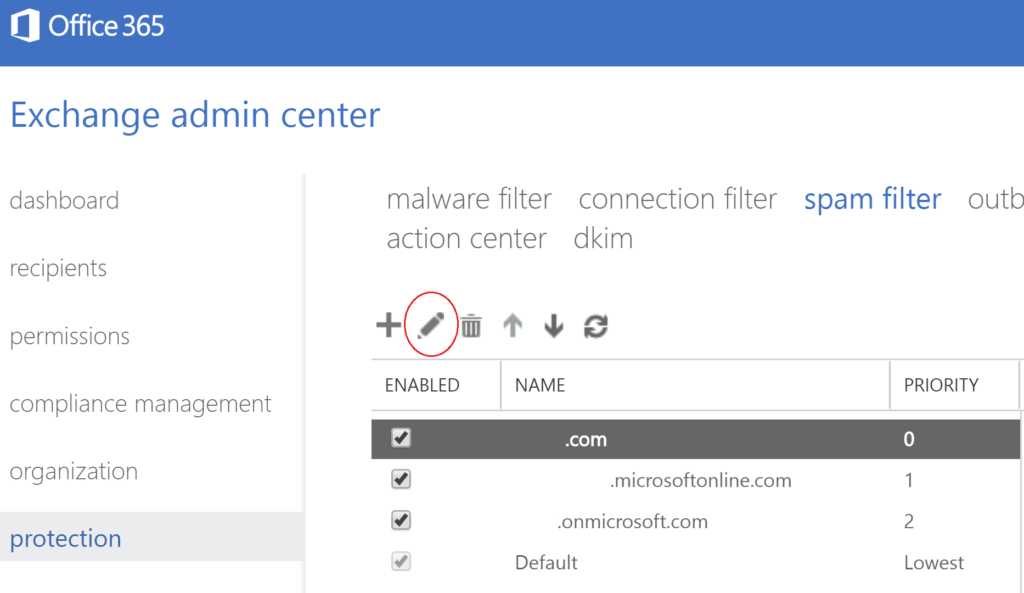
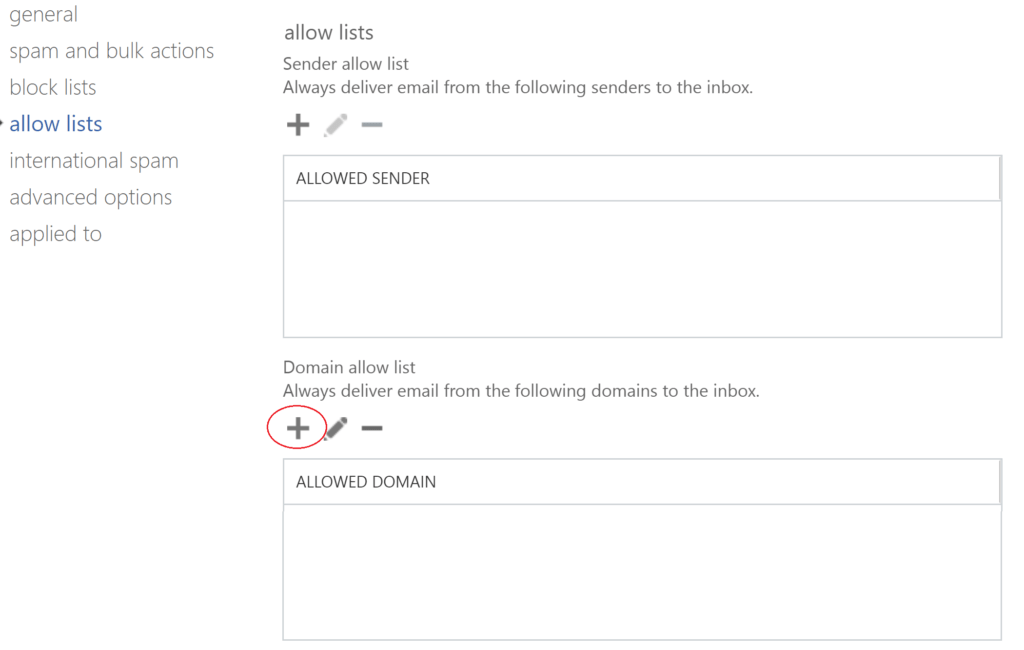
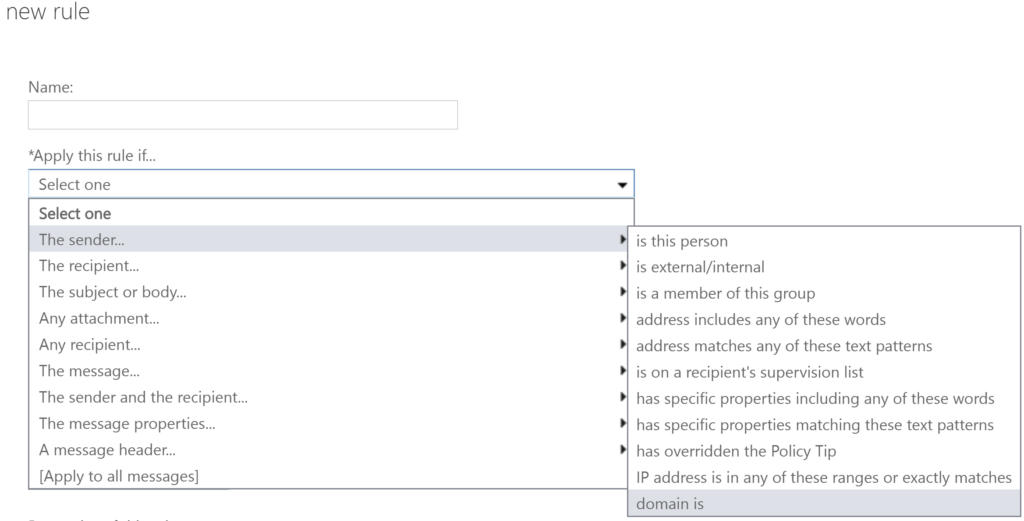
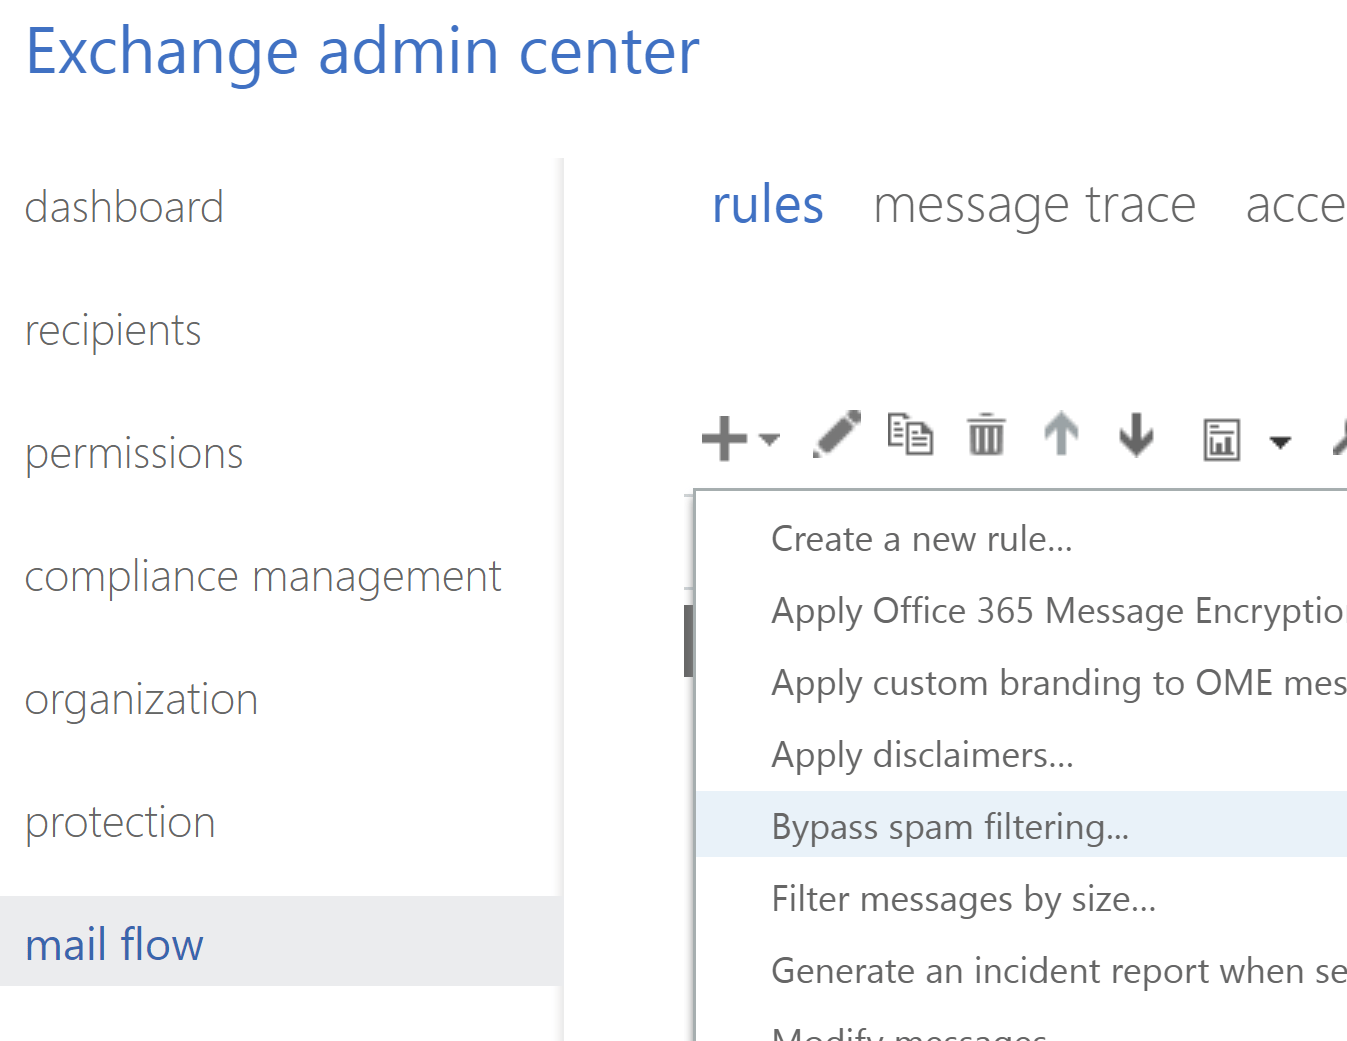
How to Whitelist an Email Domain in Office 365 Exchange Online
LK is a technology writer for Tech Journey with background of system and network administrator. He has be documenting his experiences in digital and technology world for over 15 years.
Connect with LK through Tech Journey on Facebook, Twitter or Google+.
 NoteTo whitelist multiple domains, seperate multiple entries using a semi-colon or newline.

")


