In fact, Windows 10 Reset and Refresh function has been greatly enhanced when comparing with previous versions of Windows such as Windows 8.1, Windows 8 and Windows 7. Windows 10 no longer uses a separate recovery image or partition to store system files used for reinstallation. Instead, the Refresh and Reset function rebuilds the Windows 10 operating system in place using runtime system files. By doing so, the recovery process takes less time and less disk space, and once after Windows 10 system is reset, it’s immediately up-to-date (to the point which Windows Update was last ran), eliminating the need to reinstall updates after the recovery.
This tutorial provides step-by-step guide on how to perform a reset of Windows 10.
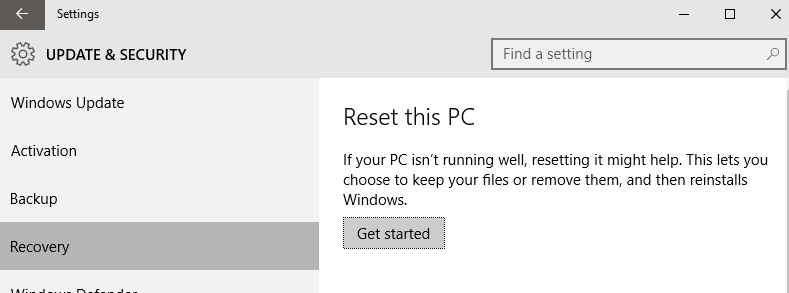
- Open Settings app.
- Go to Update & security -> Recovery.
- Under Reset this PC heading, click or tap on Get started button.
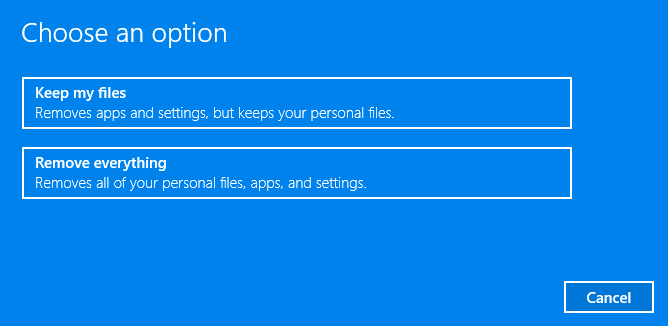
- When resetting the Windows, it’s impossible to retain any applications or programs installed. Everything will be discarded, and reverted back to fresh clean state of Windows 10 as if with clean install. However, you can choose to keep your personal files. Click or tap on Keep my files box to retain your personal files, or Remove everything to wipe off everything.
- Next, click or tap on Just remove my files to instruct Windows to just delete files (faster speed and recommended if you’re keeping the device), or Remove files and clean the drive to permanently and irrecoverably wipe all data on the hard disk (useful if you plan to recycle or giveaway the device).
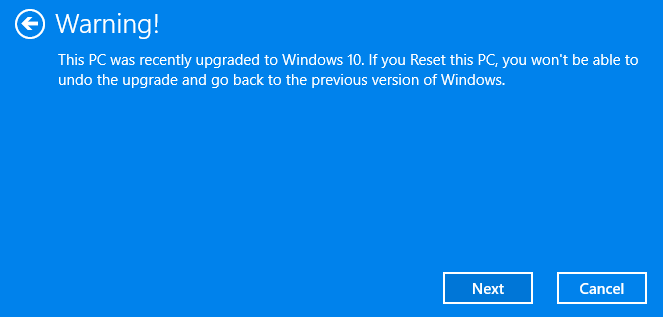
- If you upgraded from previous version of Windows to Windows 10, a warning message will notify you that you won’t be able to downgrade and rollback to previous version of Windows anymore.
Click or tap Next to proceed.
- Click or tap Reset to make the computer back to the original fresh and clean state as if it’s new installation.
When Windows 10 reset process completed, you will be able to set up the Windows 10 from scratch and fresh clean OOBE state again.
