In any cases, Microsoft is making the downgrade and rollback to Windows 8.1 or Windows 7, the OS which you’re originally upgrading from, easy. And you can always upgrade to Windows 10 again later.
In addition, you have one month to initiate the uninstallation of Windows 10 and rollback to Windows 7 or Windows 8.1. After 30 days, the old Windows installation file may be removed by Windows 10 automatically.
Though in-place rollback doesn’t work if previous Windows installation files are deleted, you can always reinstall the version of Windows that came with your PC using installation media and product key.
The tutorial provides the guide on how to in-place downgrade and rollback from Windows 10 to Windows 8.1 or Windows 7, without losing personal files, documents, photos and etc.
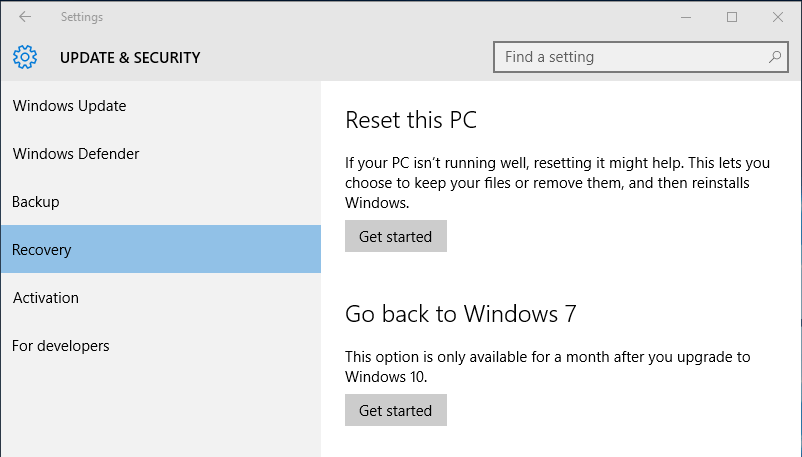
- Open Start menu and select Settings (or search for Settings).
- Go to Update & security.
- Go to Recovery tab.
- Under the heading of Go back to Windows 7 or Go back to Windows 8.1, click or tap on the Get started button.
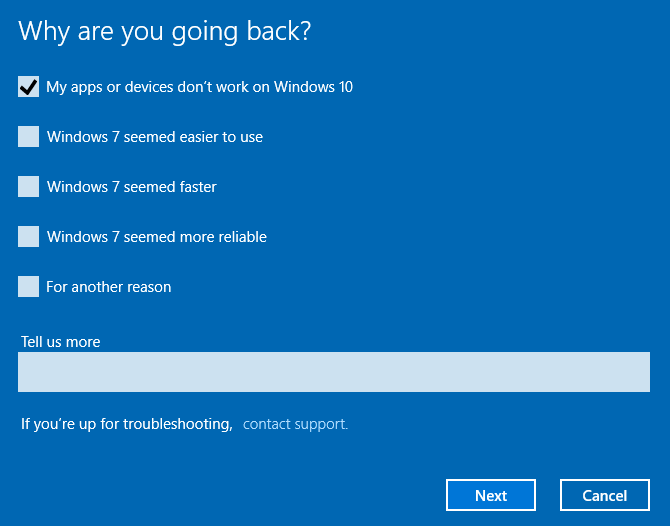
- Select a reason for why are you going back? Then, hit Next button.
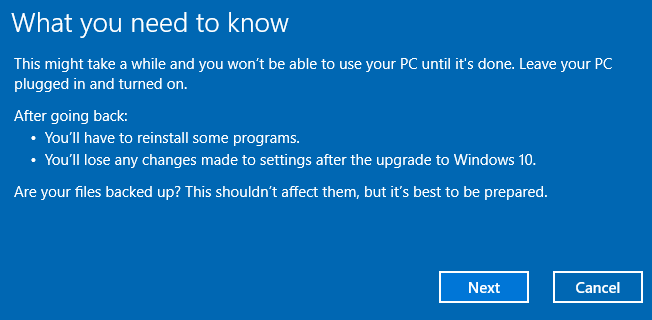
- Hit Next to continue and acknowledge the risk in “What you need to know” screen.
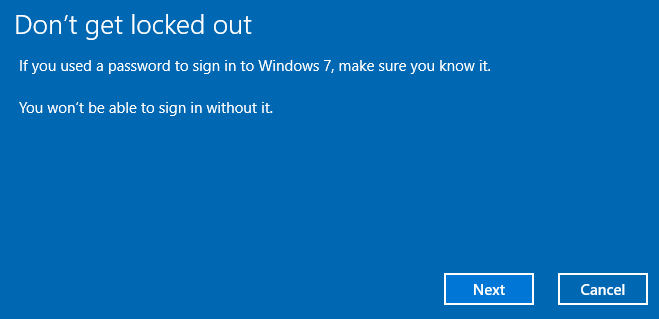
- If you’re using a password-protected account in Windows 7 or Windows 8.1, you will need the password to sign in for that account in previous Windows installation. The current Windows 10 user account credentials won’t be retained. Click or tap Next to proceed.
- In “Thanks for trying Windows 10” screen, tap or click on Go back to Windows 7 or Go back to Windows 8.1 button to start the downgrade process.
- Computer will reboot to start the rollback. Once the rollback process is completed, the system automatically boots up to the previous version of Windows.
In addition, you will lose any changes made to settings after upgrade to windows 10.
