To change the drive letter or paths in Windows, just follow these simple steps:
- Right click on Computer or This PC and select Manage to open and access Computer Management Console.
- Navigate to and expand the Storage section, and click on Disk Management to access Disk Management Console.
AlternativeType diskmgmt.msc in Run command to open Disk Management directly.
In Windows since Windows 8, including Windows 8.1, Windows 10 and Windows Server 2012, Windows Server 2012 R2, Windows Server 2015 or 2016, you can also right click on Start button or bottom left corner to reveal the Quick Access Power User menu, and then select Disk Management (or Computer Management if follow steps above).
- Disk Management Console display the details of all available volumes and disk drives in the computer configuration in the right pane.
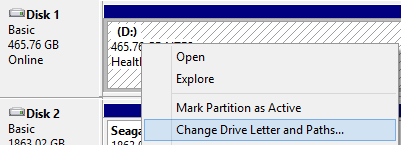
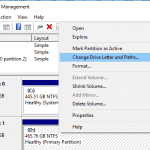
- Right click on the volume or disk drive that you want to change the drive letter, and select Change Drive Letter and Paths.
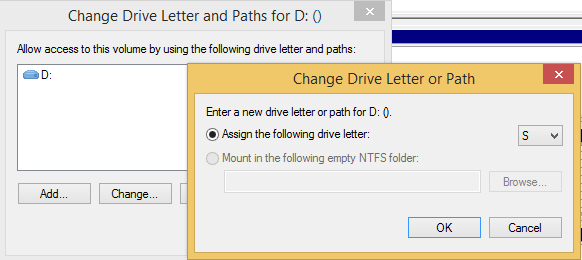
- Then click on Change button.
- Use the drop down list to select the new and your desired drive letter to assign to the disk volume.
- Click OK.
- Click Yes to confirm.
Any letter between C and Z can be assigned to a hard disk drive, CD drive, DVD drive, portable external hard disk drive, or USB flash memory key drive, while floppy disk drives use up letters A and B. Beside, the drive letter for the system volume or boot partition cannot be modified or changed. And if you install some applications or programs in the drive that you have just changed the drive letter, they may not functioning properly after the change due to the possibilities that the programs will also refer to the specific drive letter or original path used when installation as environmental variables.
